
Microsoft Outlook 2013 E-mail Setup
E-mail Setup Wizard (TR)Can’t Send or Receive E-mail?Webmail Login
Follow the steps below to set up your e-mail in Microsoft Outlook 2013. These settings apply to companies using ASO e-mail and hosting and to most other mail servers.
Screenshots show the Turkish version of the program; menu positions are the same in English.
1. Click the File tab.
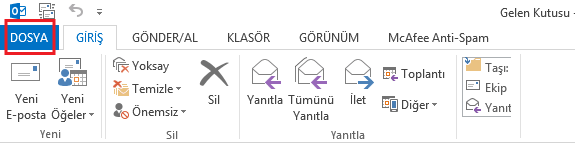
2. Click Account Settings.
.png)
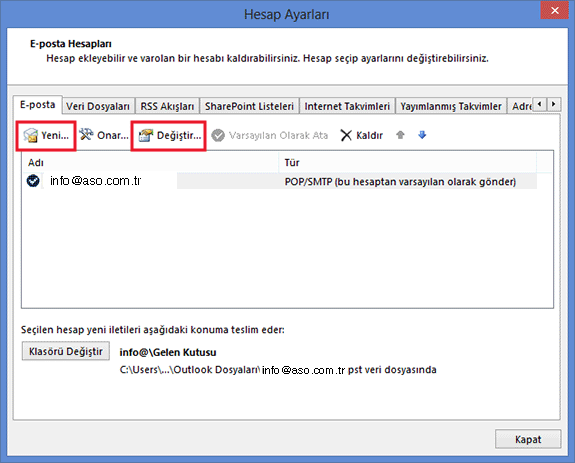
3. To set up a new account click New; to correct an existing account select it and click Change.
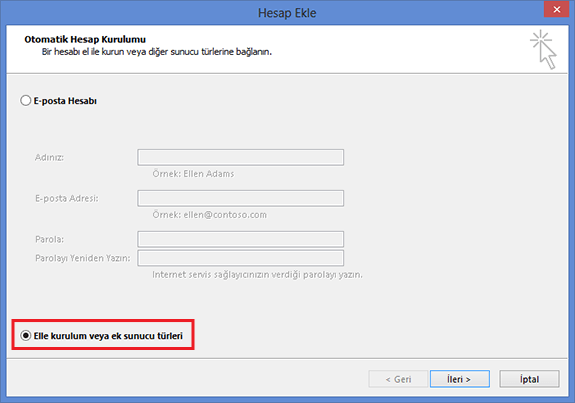
4. Select Manual setup… and click Next.
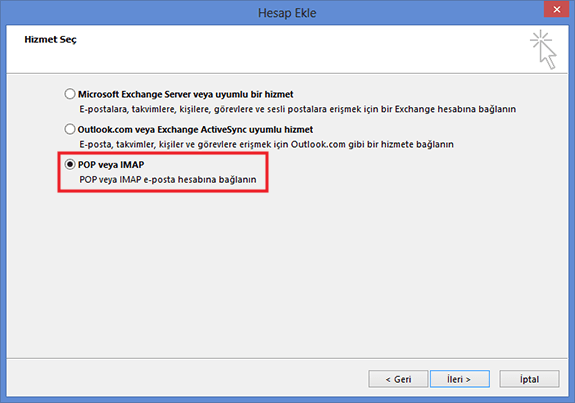
5. Select “POP” or “IMAP” and click Next.
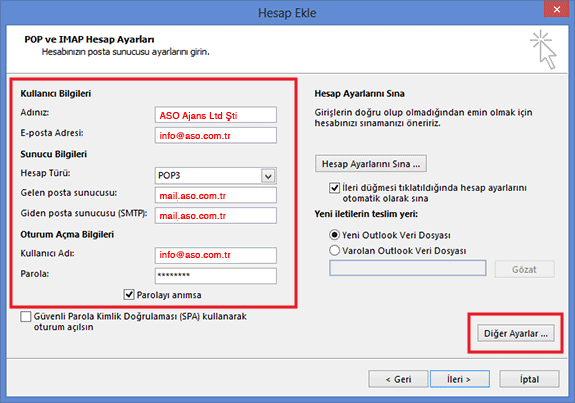
6. Enter your own details: your name, e-mail address, incoming and outgoing mail servers, account type, your full e-mail address as user name and your password, then click More Settings.
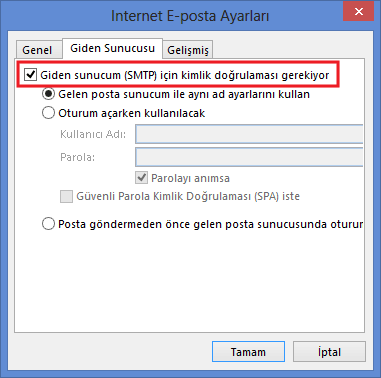
7. On the Outgoing Server tab, My outgoing server (SMTP) requires authentication must be ticked.
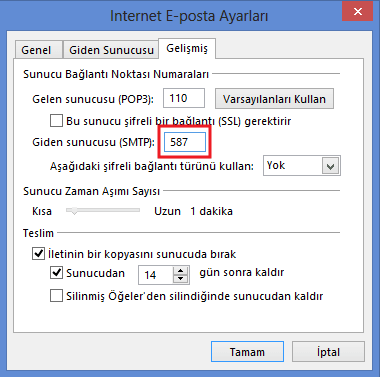
8. On the Advanced tab set the server ports (see the current settings below) and click OK.
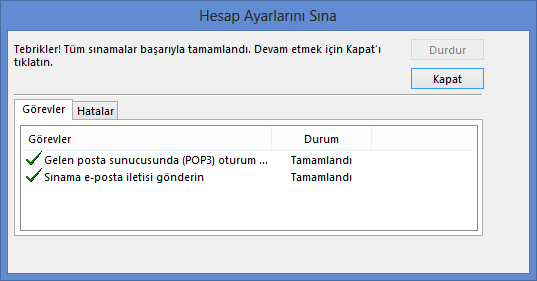
9. Click Close to finish. You can now send and receive e-mail.
SSL/TLS settings for ASO Web mail servers
If your e-mail is hosted on ASO Web servers, the settings shown in the steps above (mail.yourdomain.com, ports 110/587 without encryption) still work. To set up your e-mail with an encrypted SSL/TLS connection, use:
| Incoming / outgoing server | smaug.aso.com.tr |
| IMAP | port 993, SSL/TLS |
| POP3 | port 995, SSL/TLS |
| SMTP (outgoing) | port 465, SSL/TLS, authentication required |
| User name | your full e-mail address |
Company E-mail Prices


Comments (0)