
Create a Signature in Windows Live Mail (Illustrated)
This guide is for Windows Live Mail. It is kept for users who still use this version. For current devices and programs:
E-mail Setup Wizard (TR)Can’t Send or Receive E-mail?Webmail Login
E-mail Setup Wizard (TR)Can’t Send or Receive E-mail?Webmail Login
Follow the steps below to create a signature in Windows Live Mail. Your signature then appears automatically at the bottom of every new message, so you don’t have to type your name, phone and address each time.
Start > open Windows Live Mail.
- In the lower-left corner click Mail.
- In the upper-left corner open the File menu, click Options and then Mail.
- The Options dialog box opens.
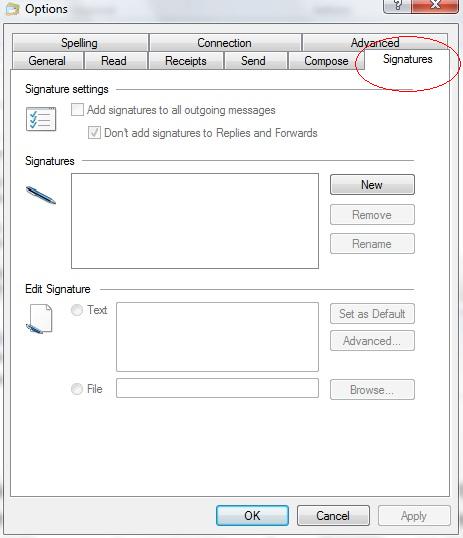
- Click the Signatures tab.
- Under Signatures click New.
- Under Edit Signature, either type your signature in the text box, or click File and Browse to select a text or HTML file containing your signature and click Open.
- Click OK.
To add the signature to all messages automatically, tick Add signatures to all outgoing messages. If you use more than one signature, select the one you want and click Set as Default.
Need company e-mail with your own domain? Get trouble-free company e-mail on ASO Web servers with phone support.
Company E-mail Prices
Company E-mail Prices
Frequently asked questions
How do I create a signature in Windows Live Mail?
Go to File > Options > Mail, open the Signatures tab, click New and type your signature or choose a file in the Edit Signature section.
How do I set a default signature?
Select the signature you want to use and click Set as Default.
How do I delete a signature?
In File > Options > Mail > Signatures select the signature and click Remove.


Comments (0)