Email Settings for Android Phones (Illustrated setup)
Below are the email settings for the Android operating system, which is mostly used in today’s smartphones. You can use these settings for Samsung, Sony, HTC and other android phones.
Sample Email: [email protected]
Your password ******
You can learn this information from the company you receive hosting service.
Email setup steps for Android phones (Android Phone Email Settings)
- Enter the “Email” section from the Home Page
- Type your email address and password, click Next
- Click on the POP3 account button
- username: adını[email protected]
- Your password: ******
Incoming Mail Server IMAP (checks your messages from the server, does not download them to your phone and does not take up space on your phone)
- IMAP server: mail.alanadiniz.com
- Port: 143
- Security (Security type): None
- Delete email from server: Never and click NextGiden Posta Sunucusu SMTP Sunucusu
- SMTP server (SMTP Server): mail.alanadiniz.com
- Port: 587
- Security (Security Type): None
- Require sign-in: checked
- Username: [email protected]
- Your password ******
- and click Next and Next again
- Give your account a name
- and click Finish.
Your Android phone settings will be checked. You can now send and receive emails from the Email button on the desktop.
Apart from all these settings, you can also send and receive emails by logging in to your Webmail from your phone’s browser. Open Safari for this. Type www.aso.com.tr in the address field. Click on the Web Mail link from the internet menu. Log in to your account with your email address and password.
Resimli Kurulum
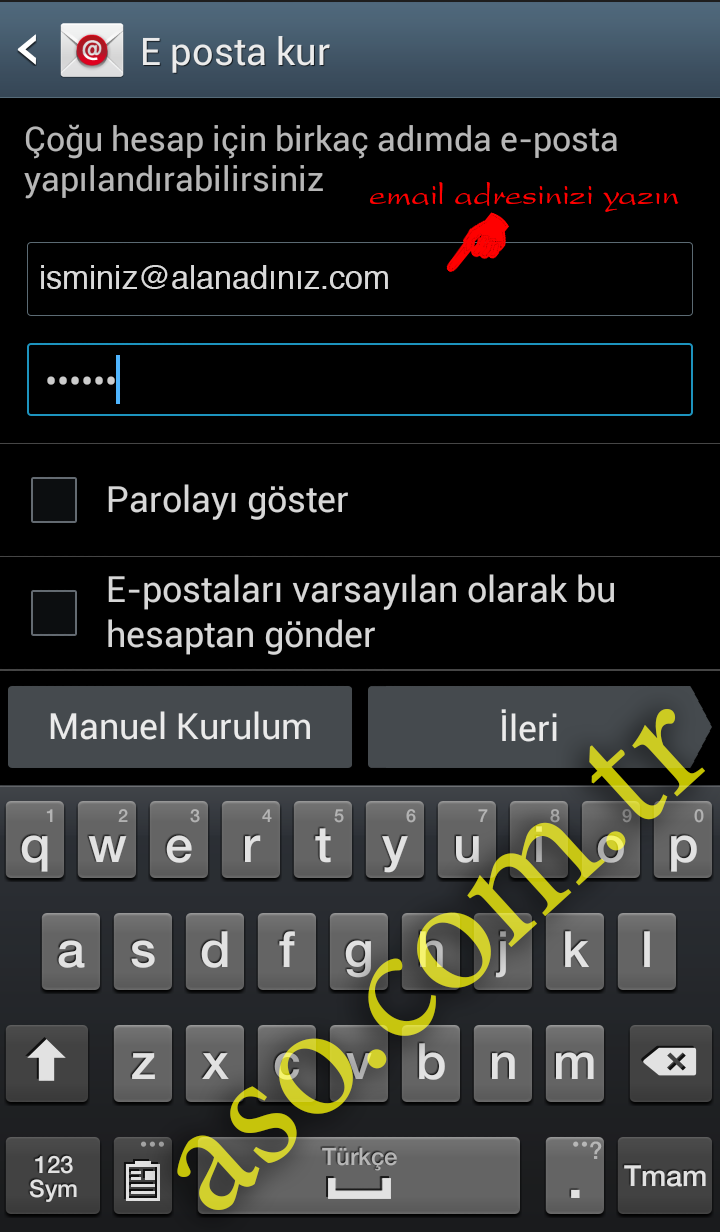
1- Type your e-mail address and password (pay attention to capitalization when typing a password)
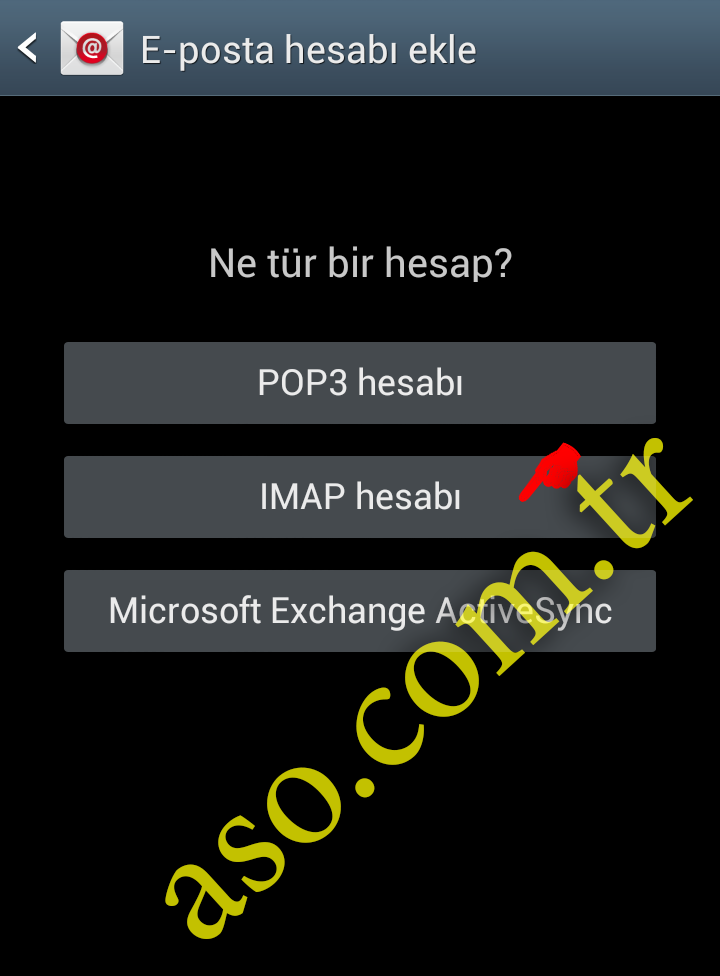
2- Choose IMAP or POP3. IMAP keeps your messages on the server and downloads only the headers to your phone. When you open the message you want to read, it downloads the entire message from the server. Thus, your messages take up less space on your phone.
A POP3 account downloads all messages to your phone (takes up more space on your phone).
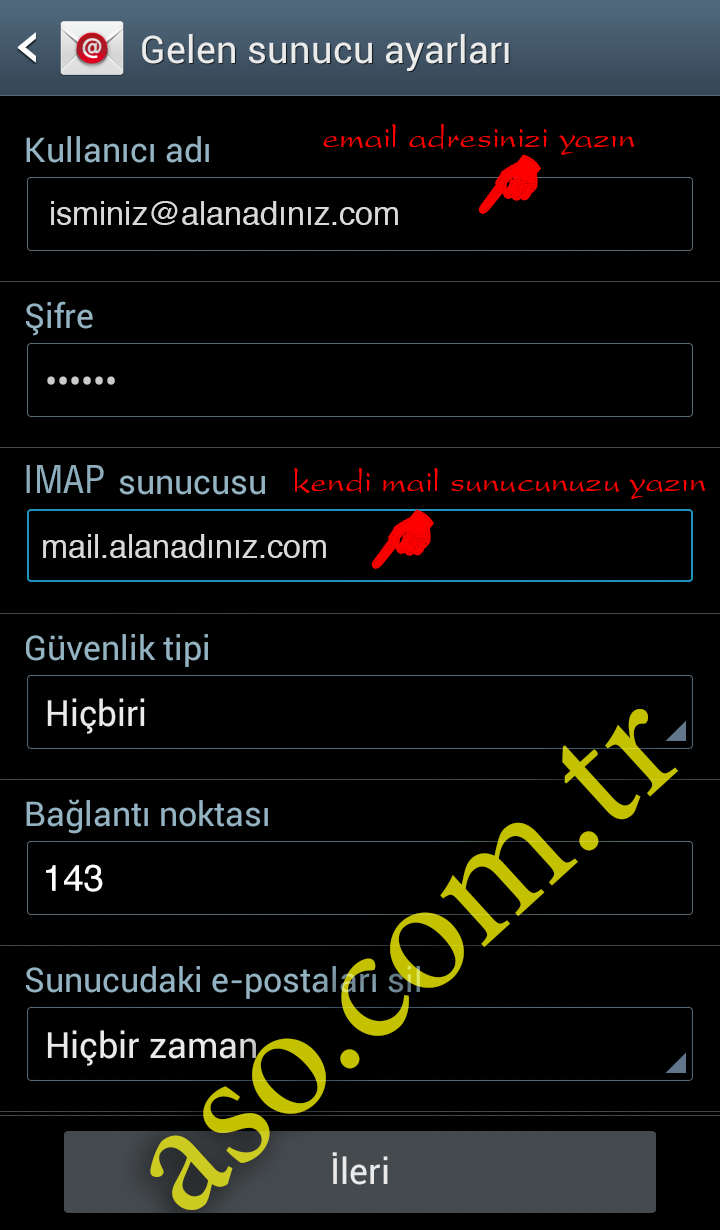
3- Type your full e-mail address in the username section.
Type your password (case sensitive)
In the server section, type mail.alanadiniz.com. (If you do not know your mail server, you can find out from the company you receive service from. Usually it is enough to put “mail.” at the beginning of your domain name).
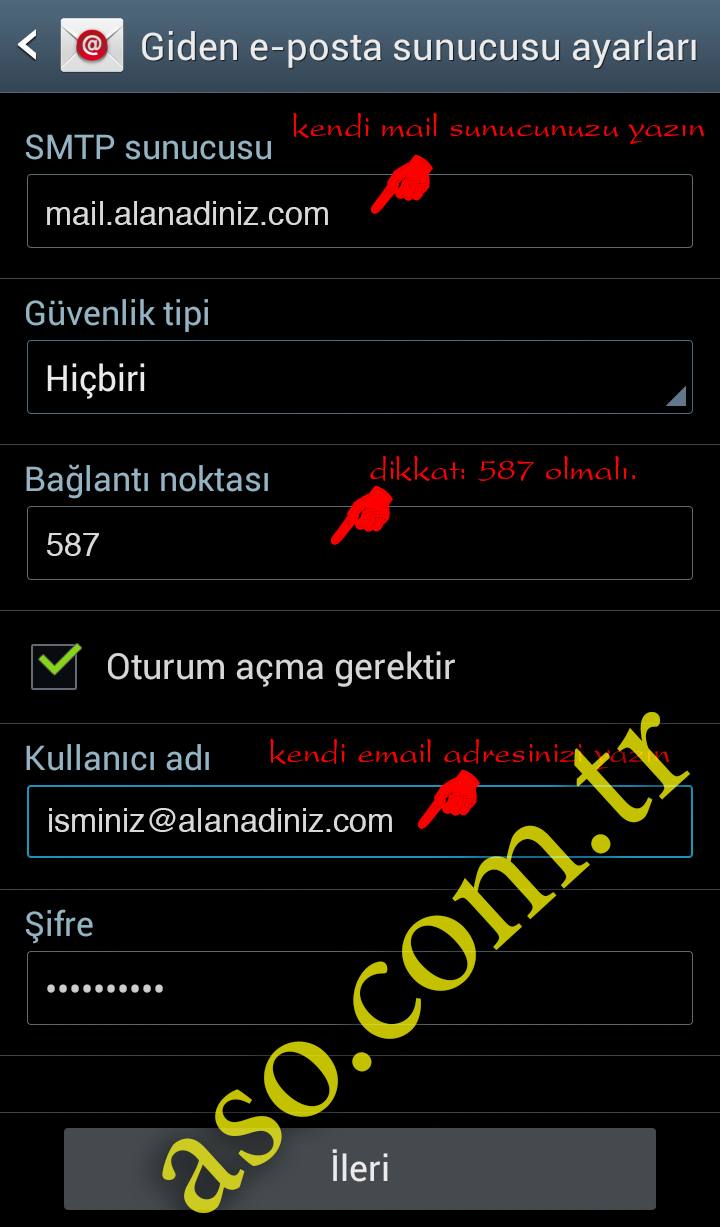
4- In the outgoing server section, enter your own server, again mail.yourdomain.com (usually the same as the incoming server).
Connection point 587
Enter your entire email address and password in the Username section.
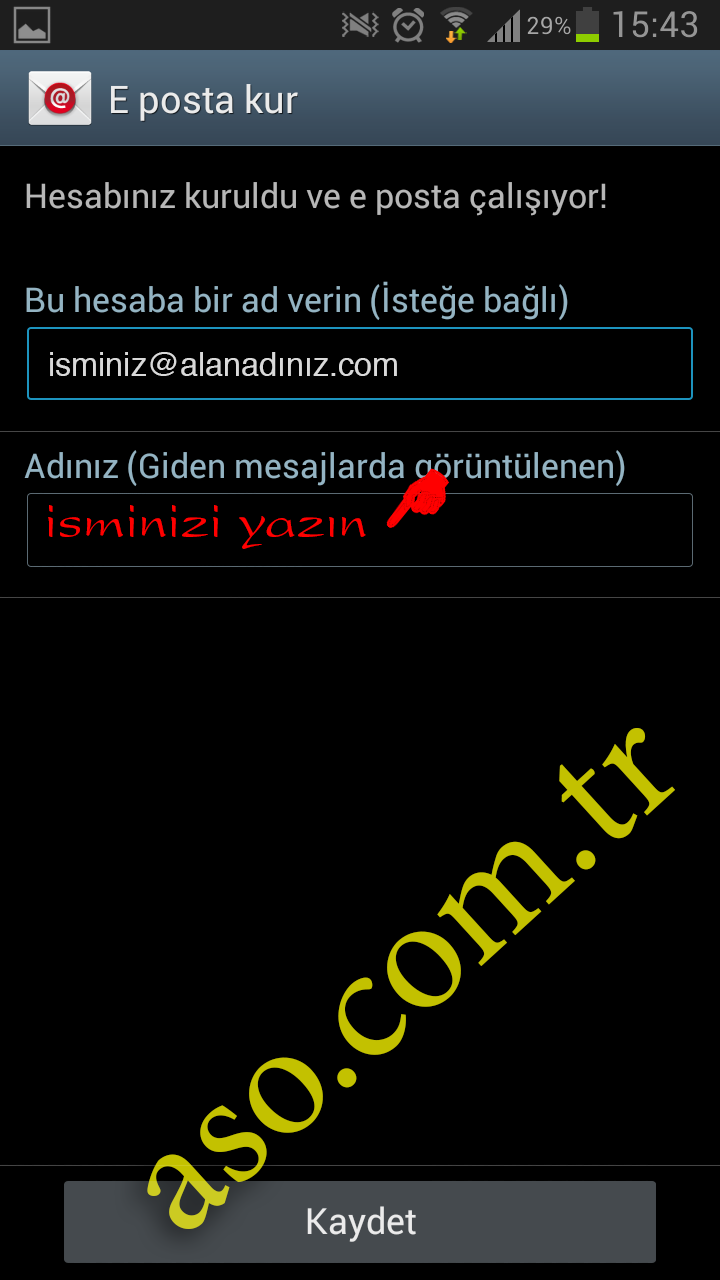
5- Congratulations. You have set up your account. In the Name section, enter the name you want to appear on the counter.
Tags: samsung android email settings, samsung android email settings, android mail configuration, android mail settings, android mail settings, android mail setting, android mail settings, ANDROID email settings with picture, android email setting with photo.
Comments (0)