iPhone Email Setup (Illustrated settings) for iOS 12+
iPhone Email Setup Settings applies to iOS 14 and later.
It is very easy to set up your e-mail address on your phone with your password. You can set up mail by applying the settings below for iPhone 6 and later (iOS 12 and higher operating system).
We will install as IMAP (This allows you to keep your mail on the server. It takes up less space on your phone)
Sample e-mail address: [email protected]
Your password: ******
(Some servers may require different port and server settings. However, it is valid for 99% of servers including our servers.)
Back up your documents on your computer to an online FTP area. Protect your documents against computer failures, viruses. Backup and share your large files.

1- Enter Settings from the Phone home screen.
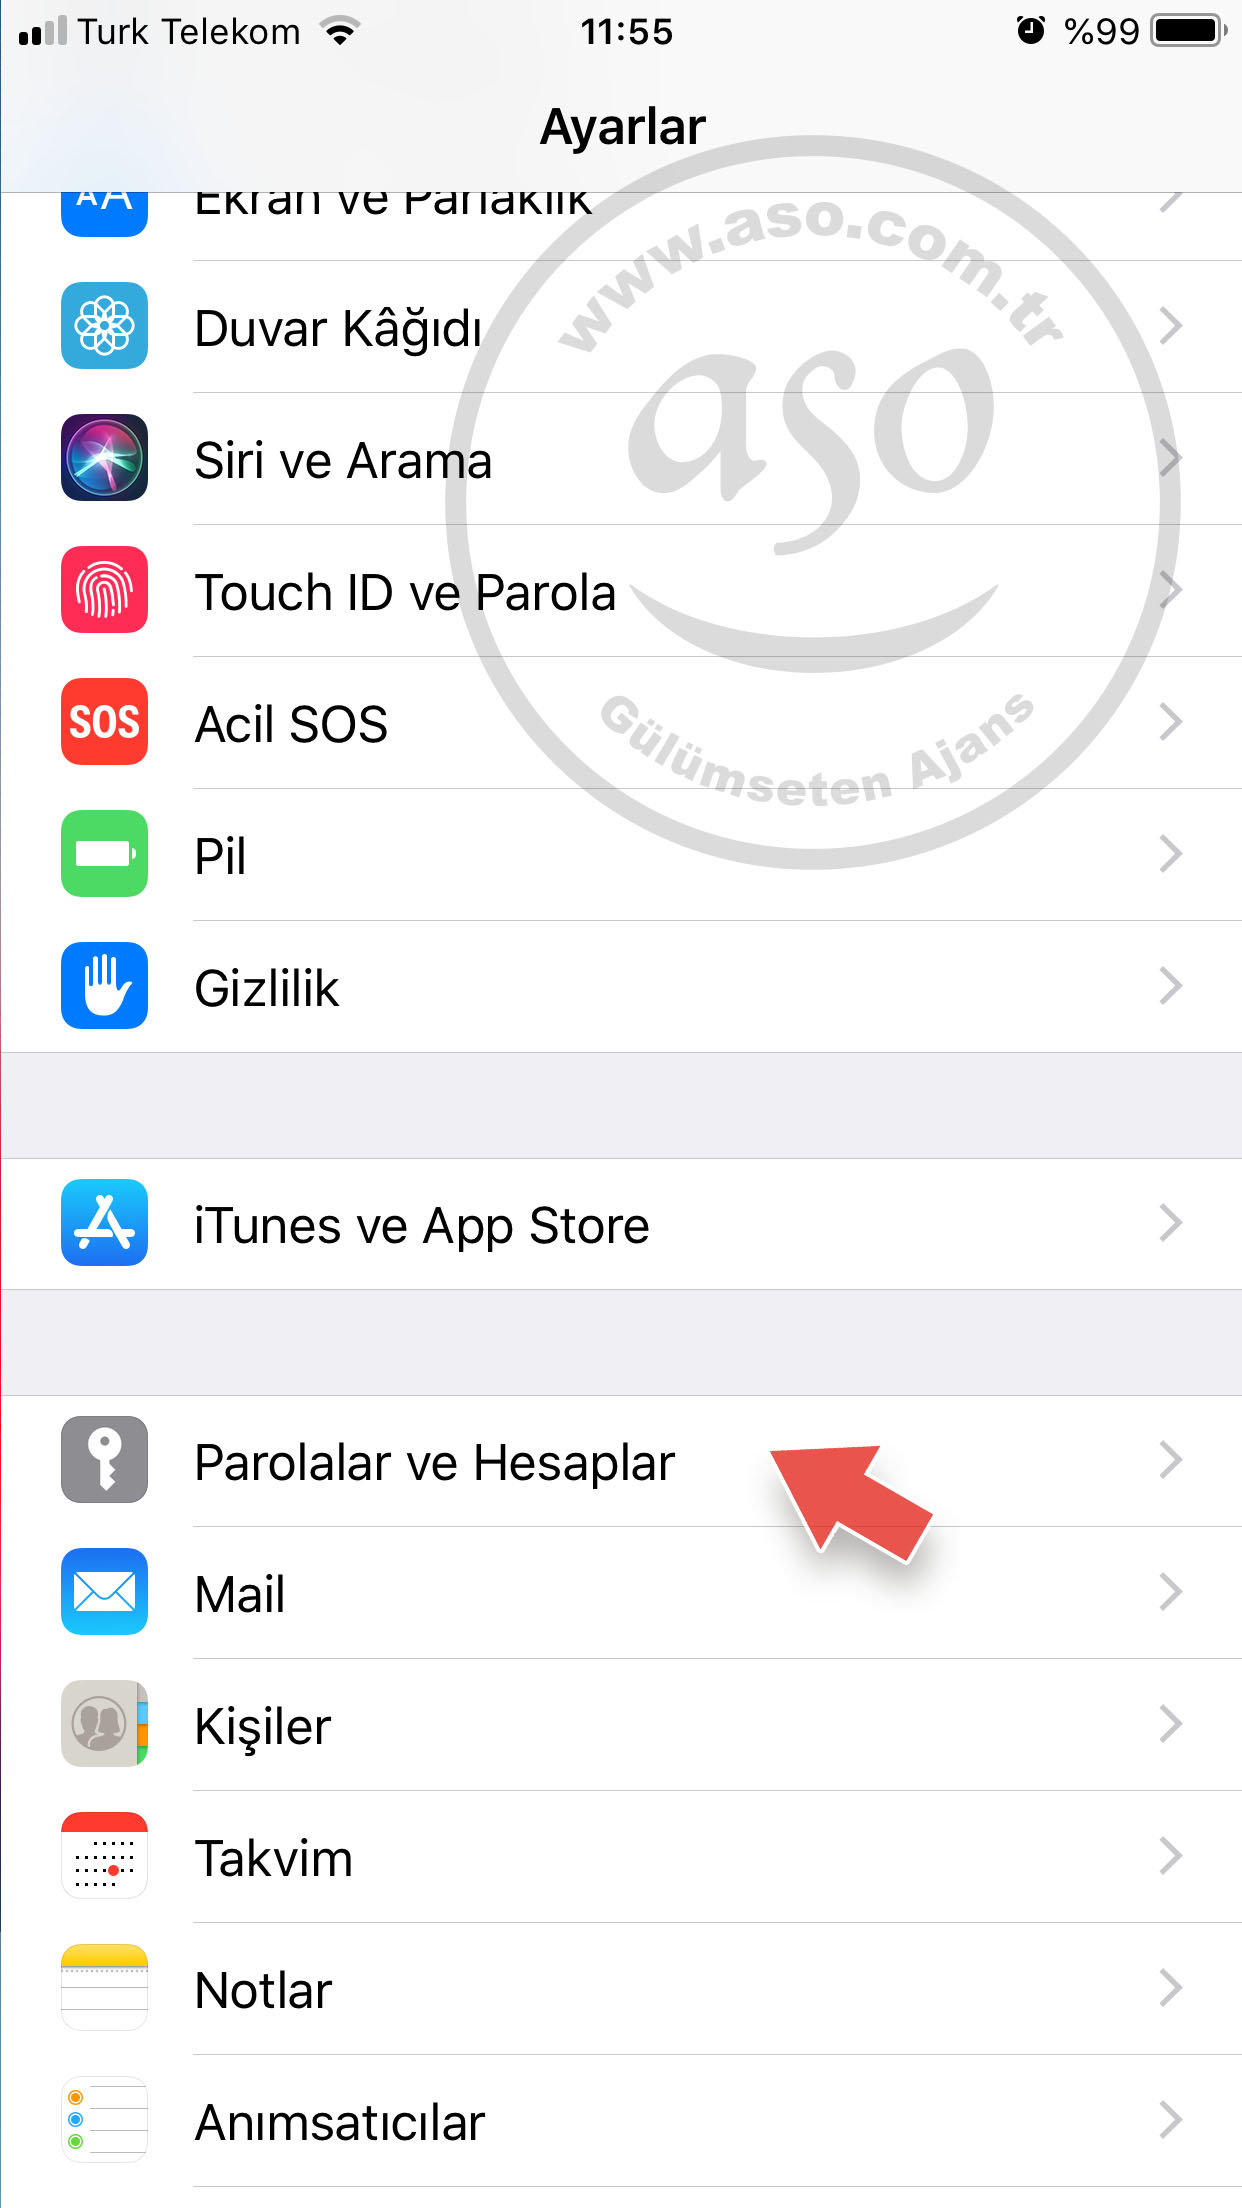
2- Click on “Passwords and Accounts“.
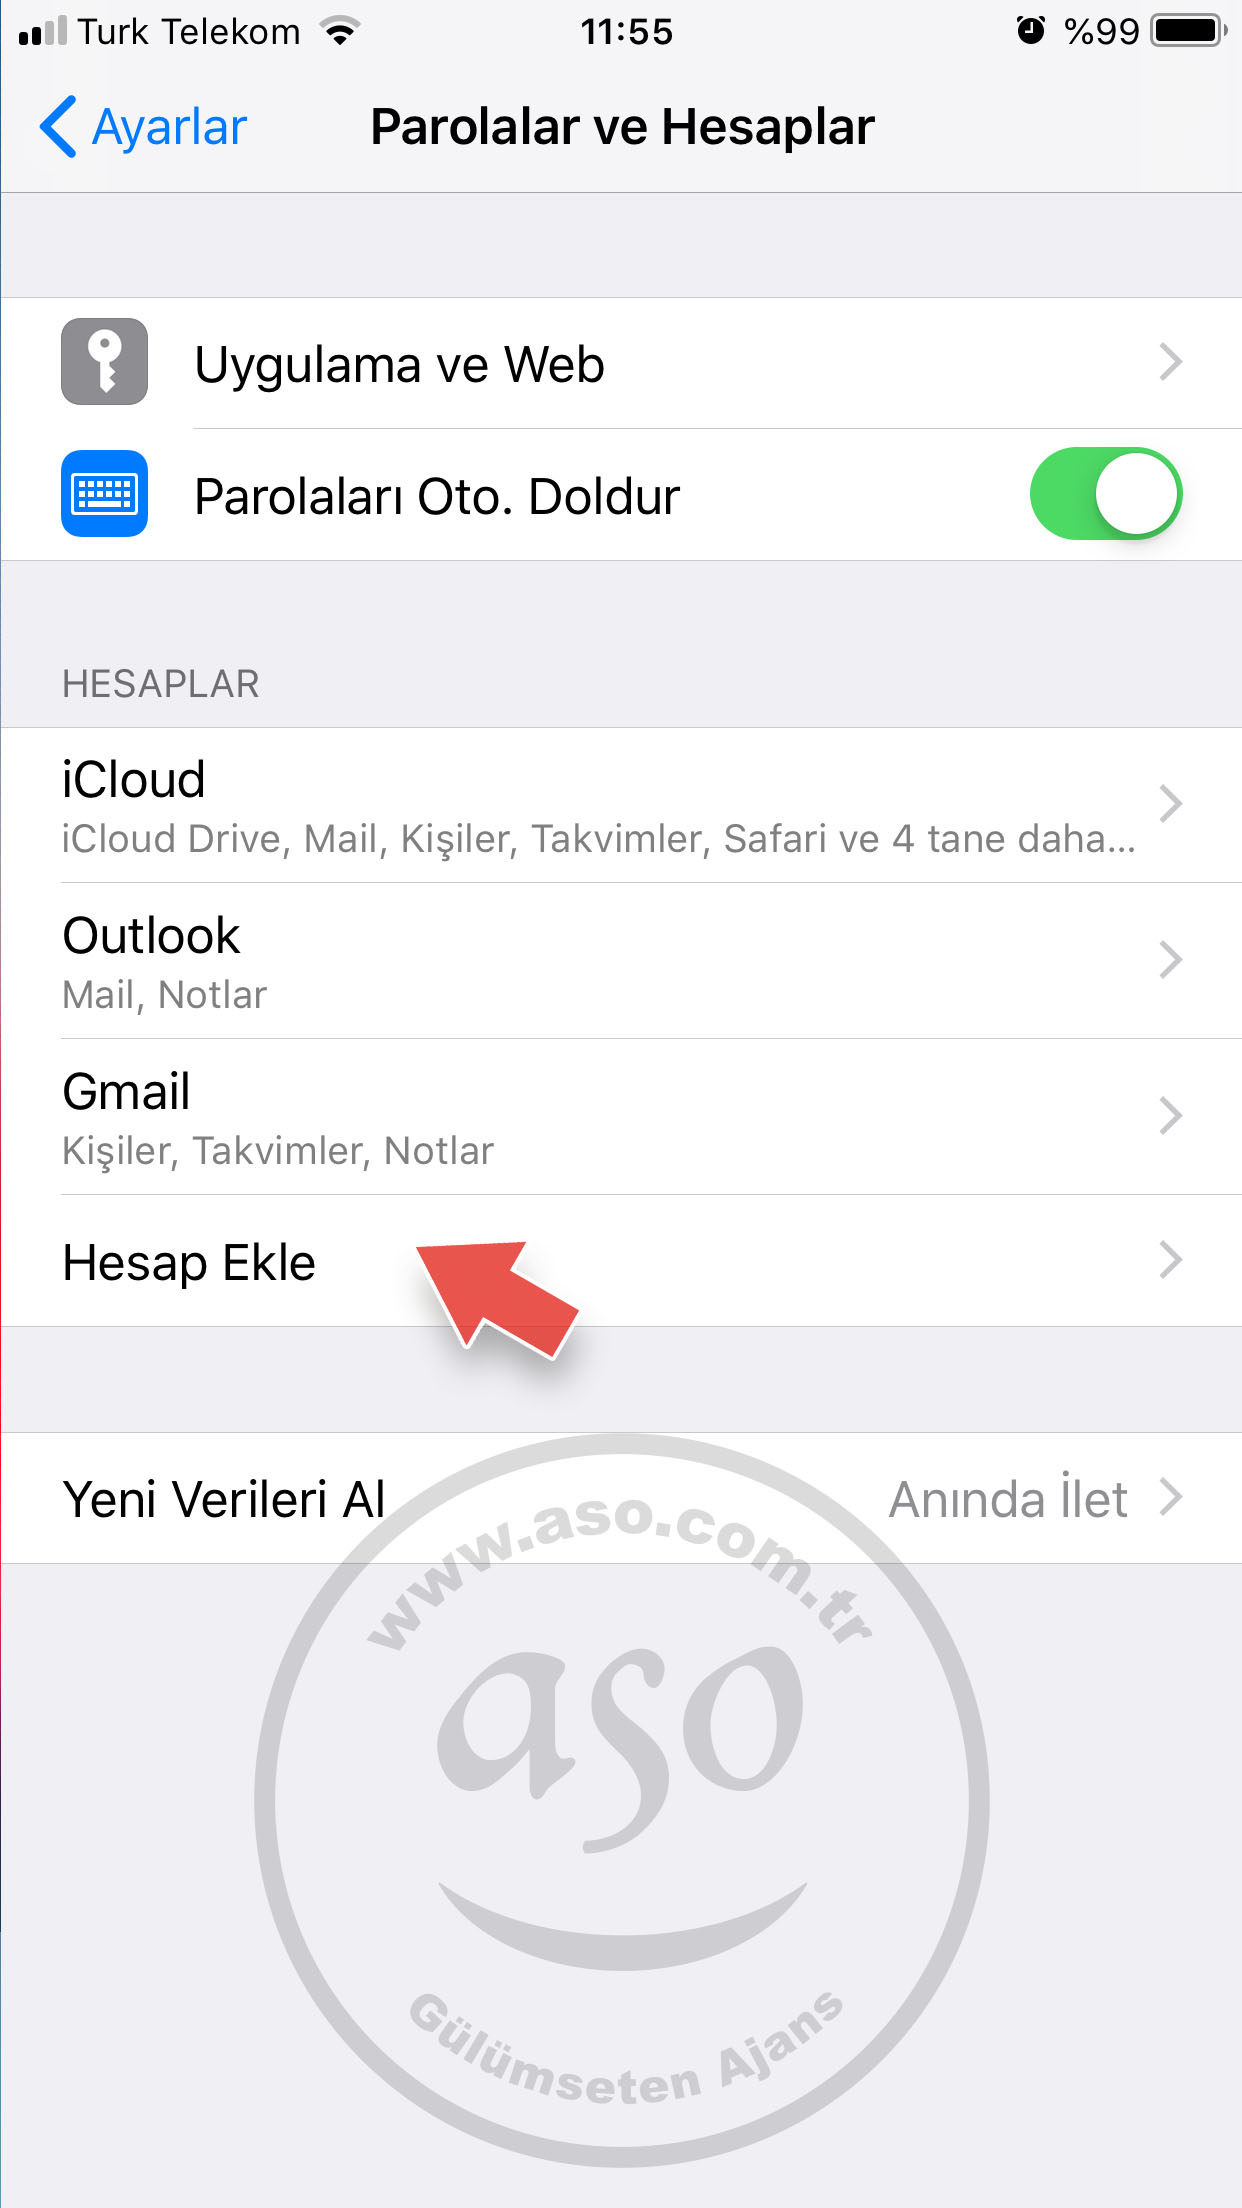
3- Click the “Add Account” button.
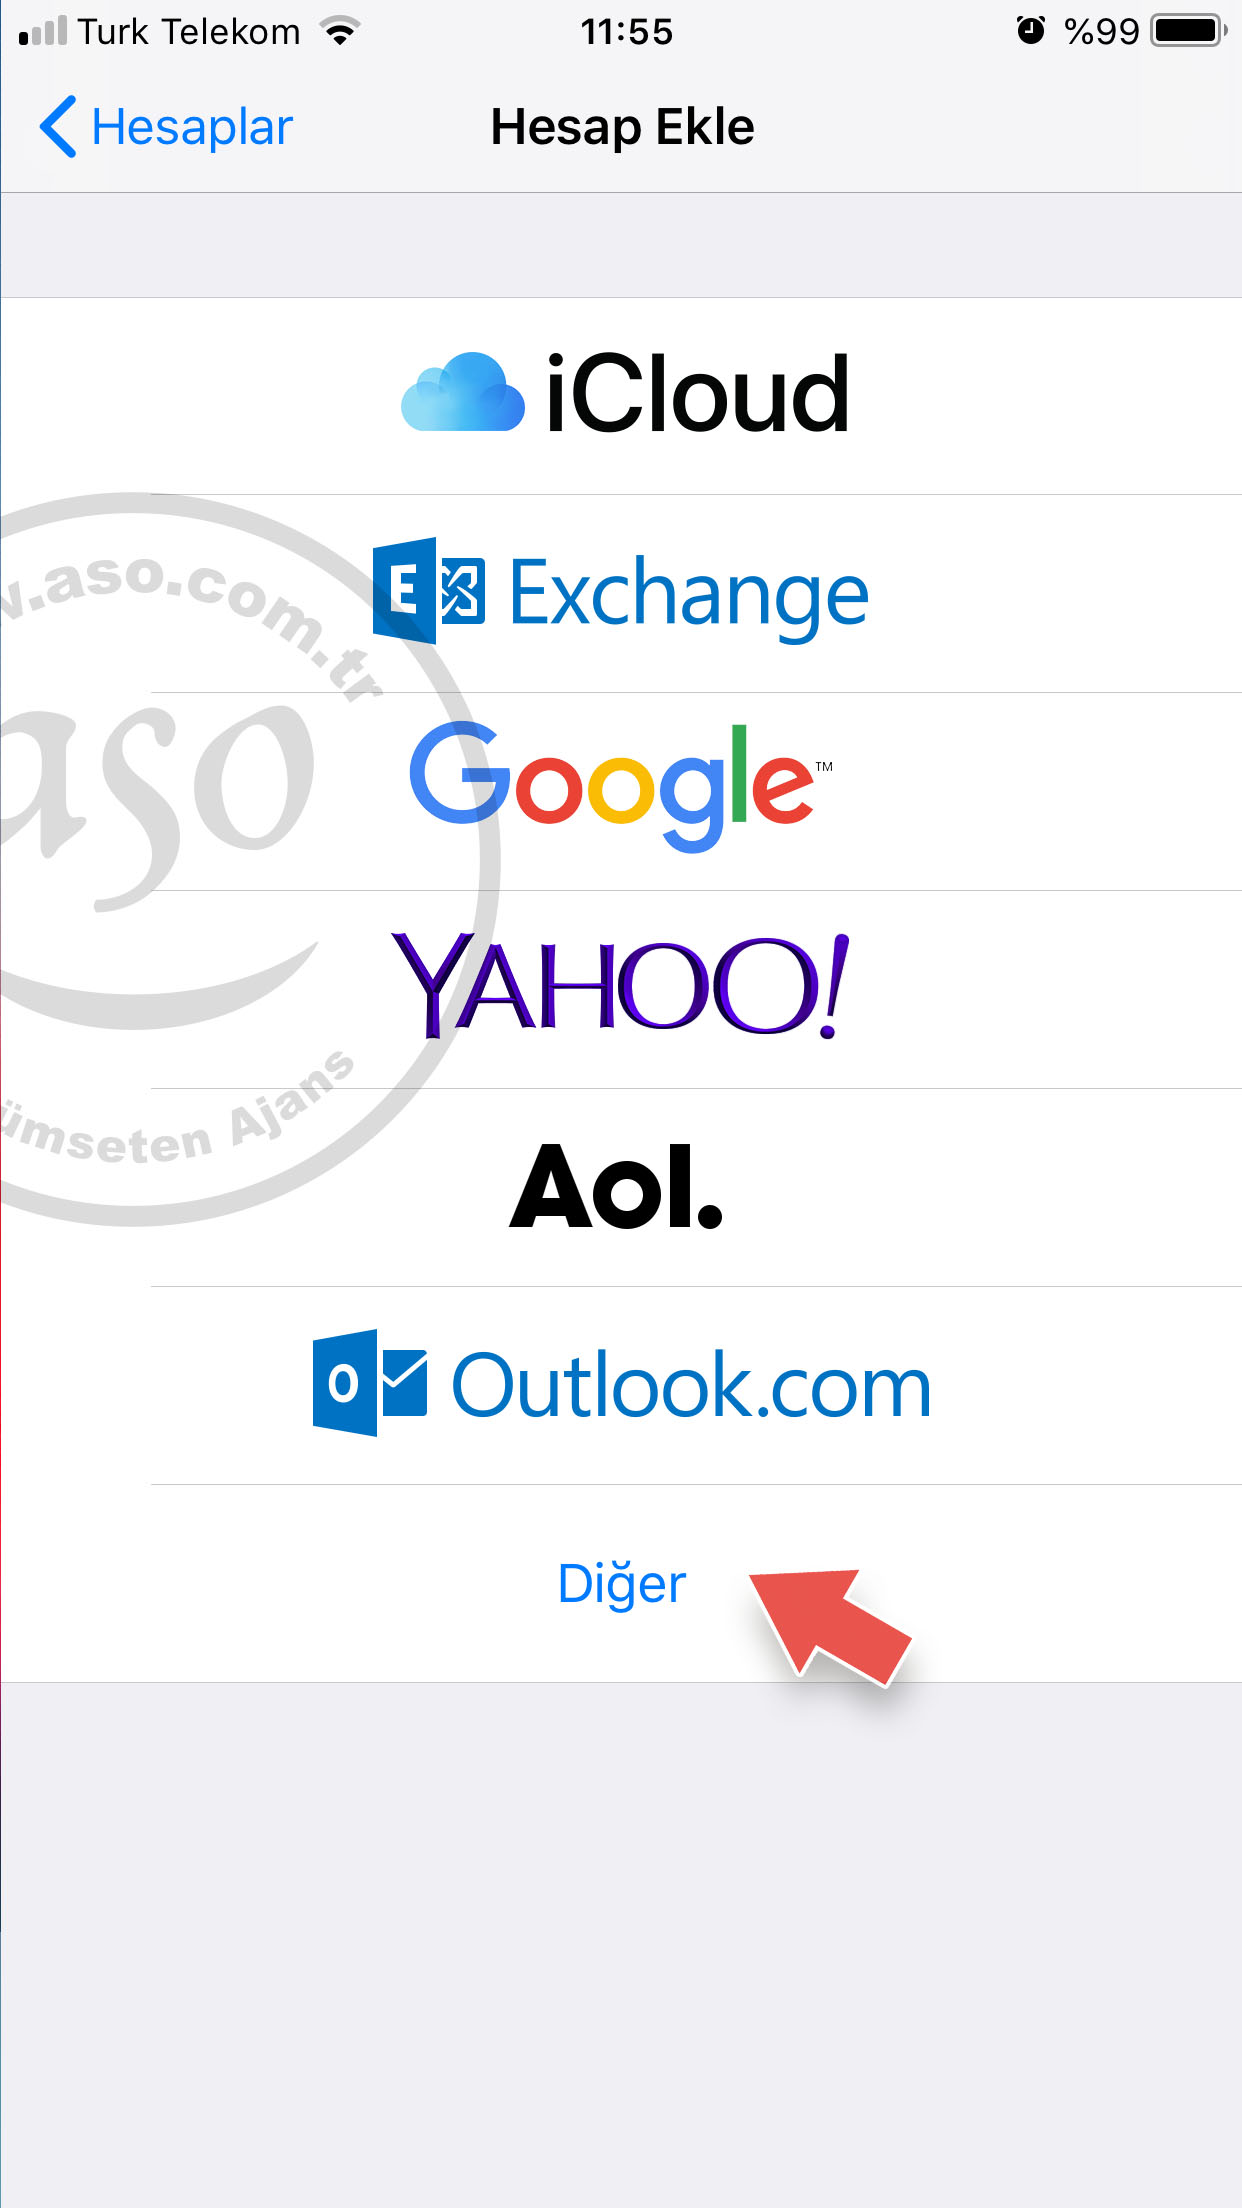
4- Click the More button (if you are using Outlook mail, Hotmail, Gmail, Yahoo email addresses, click one of them and enter your email address and password. The installation will be finished here. If you are not using one of these, click on the “More” button).
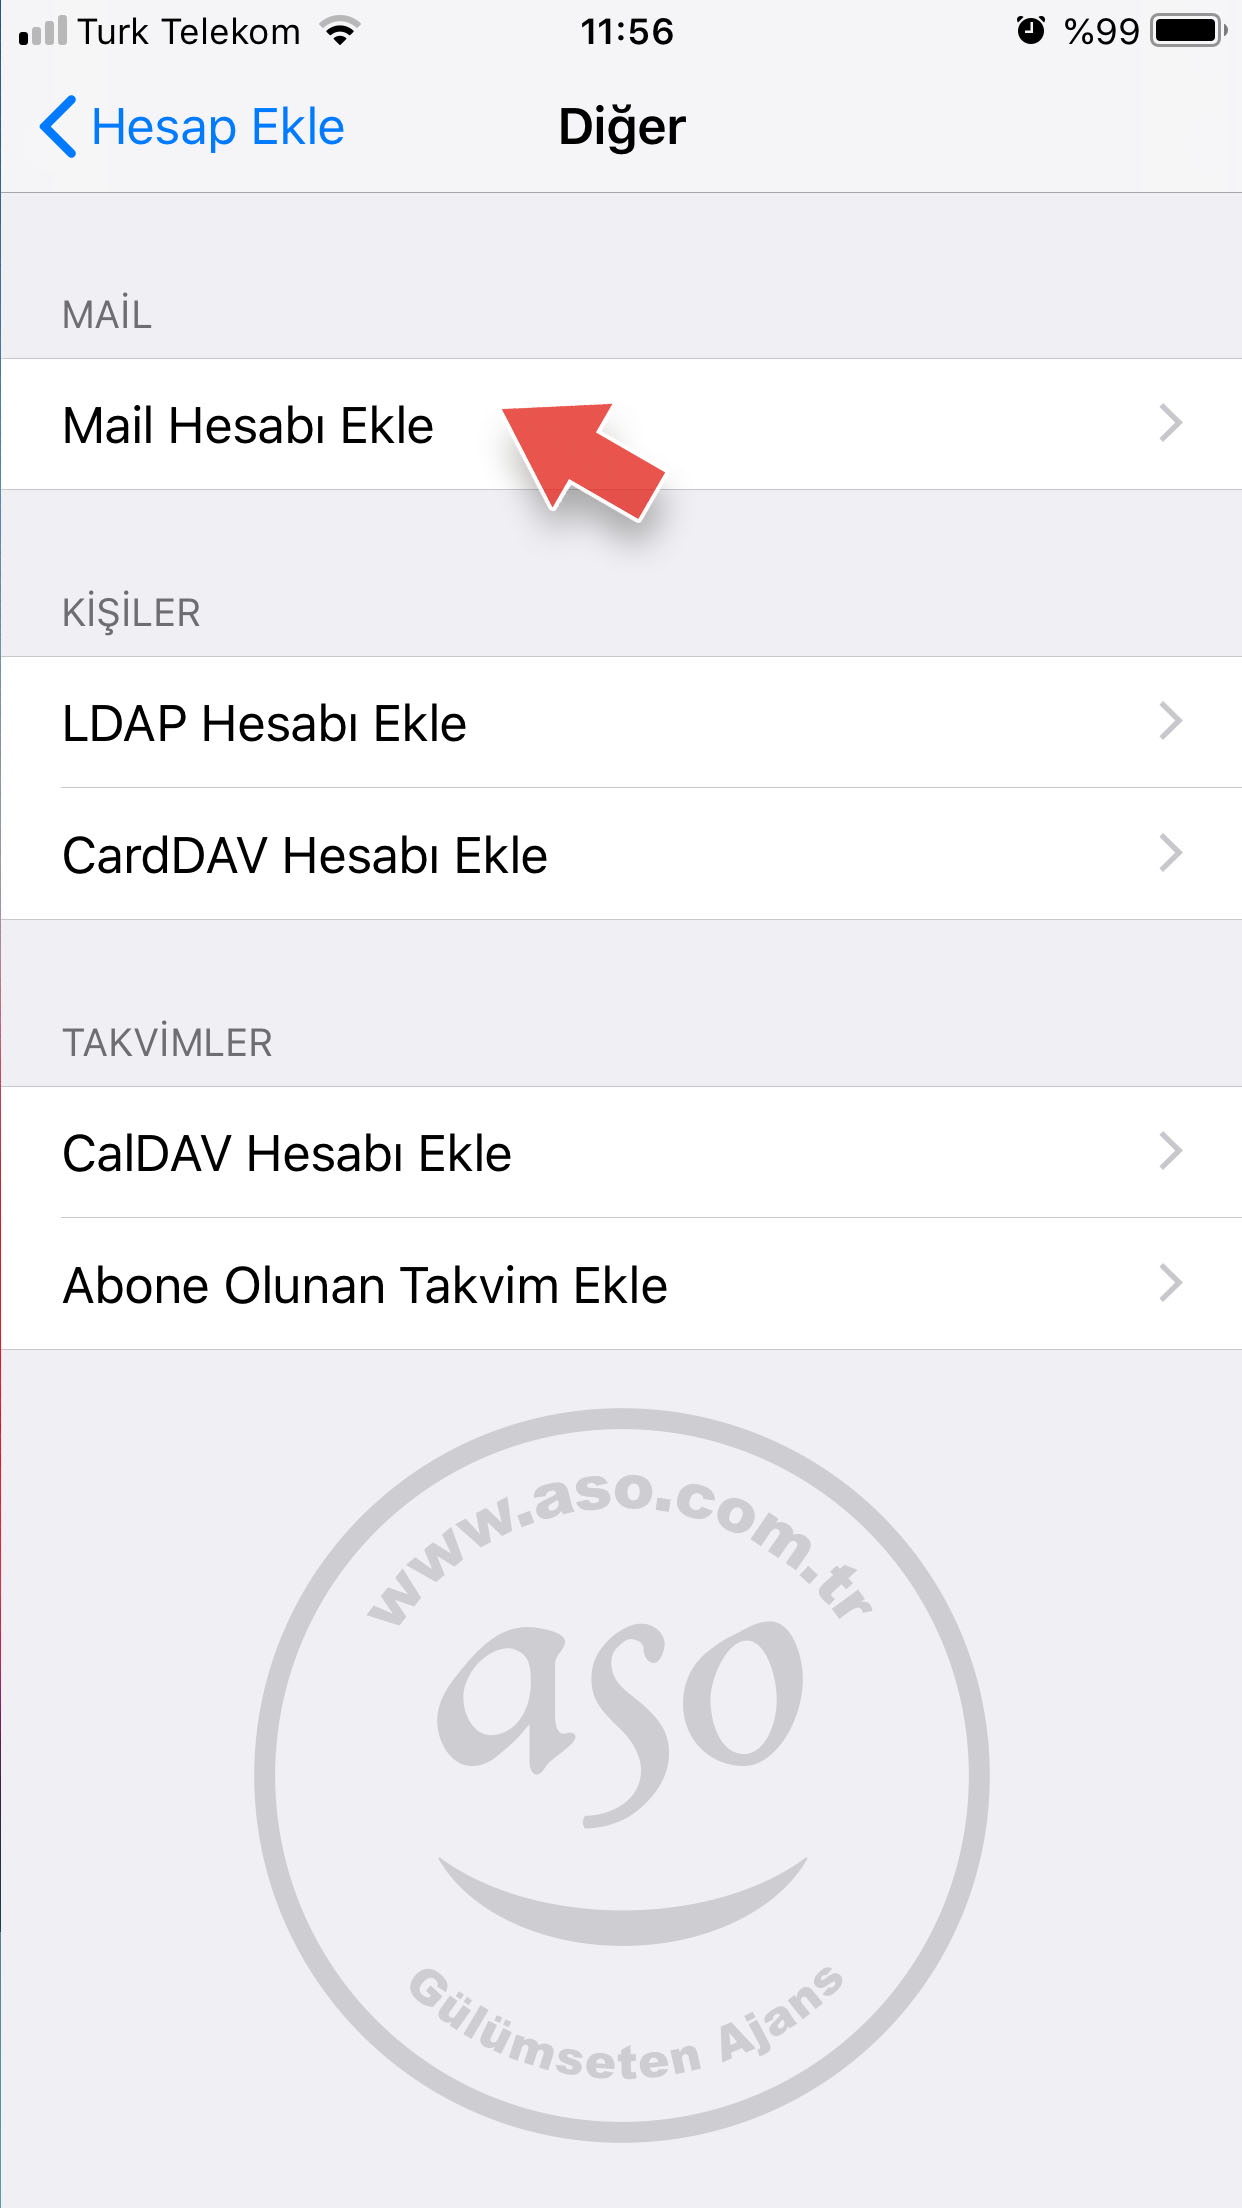
5- Click Add Mail Account
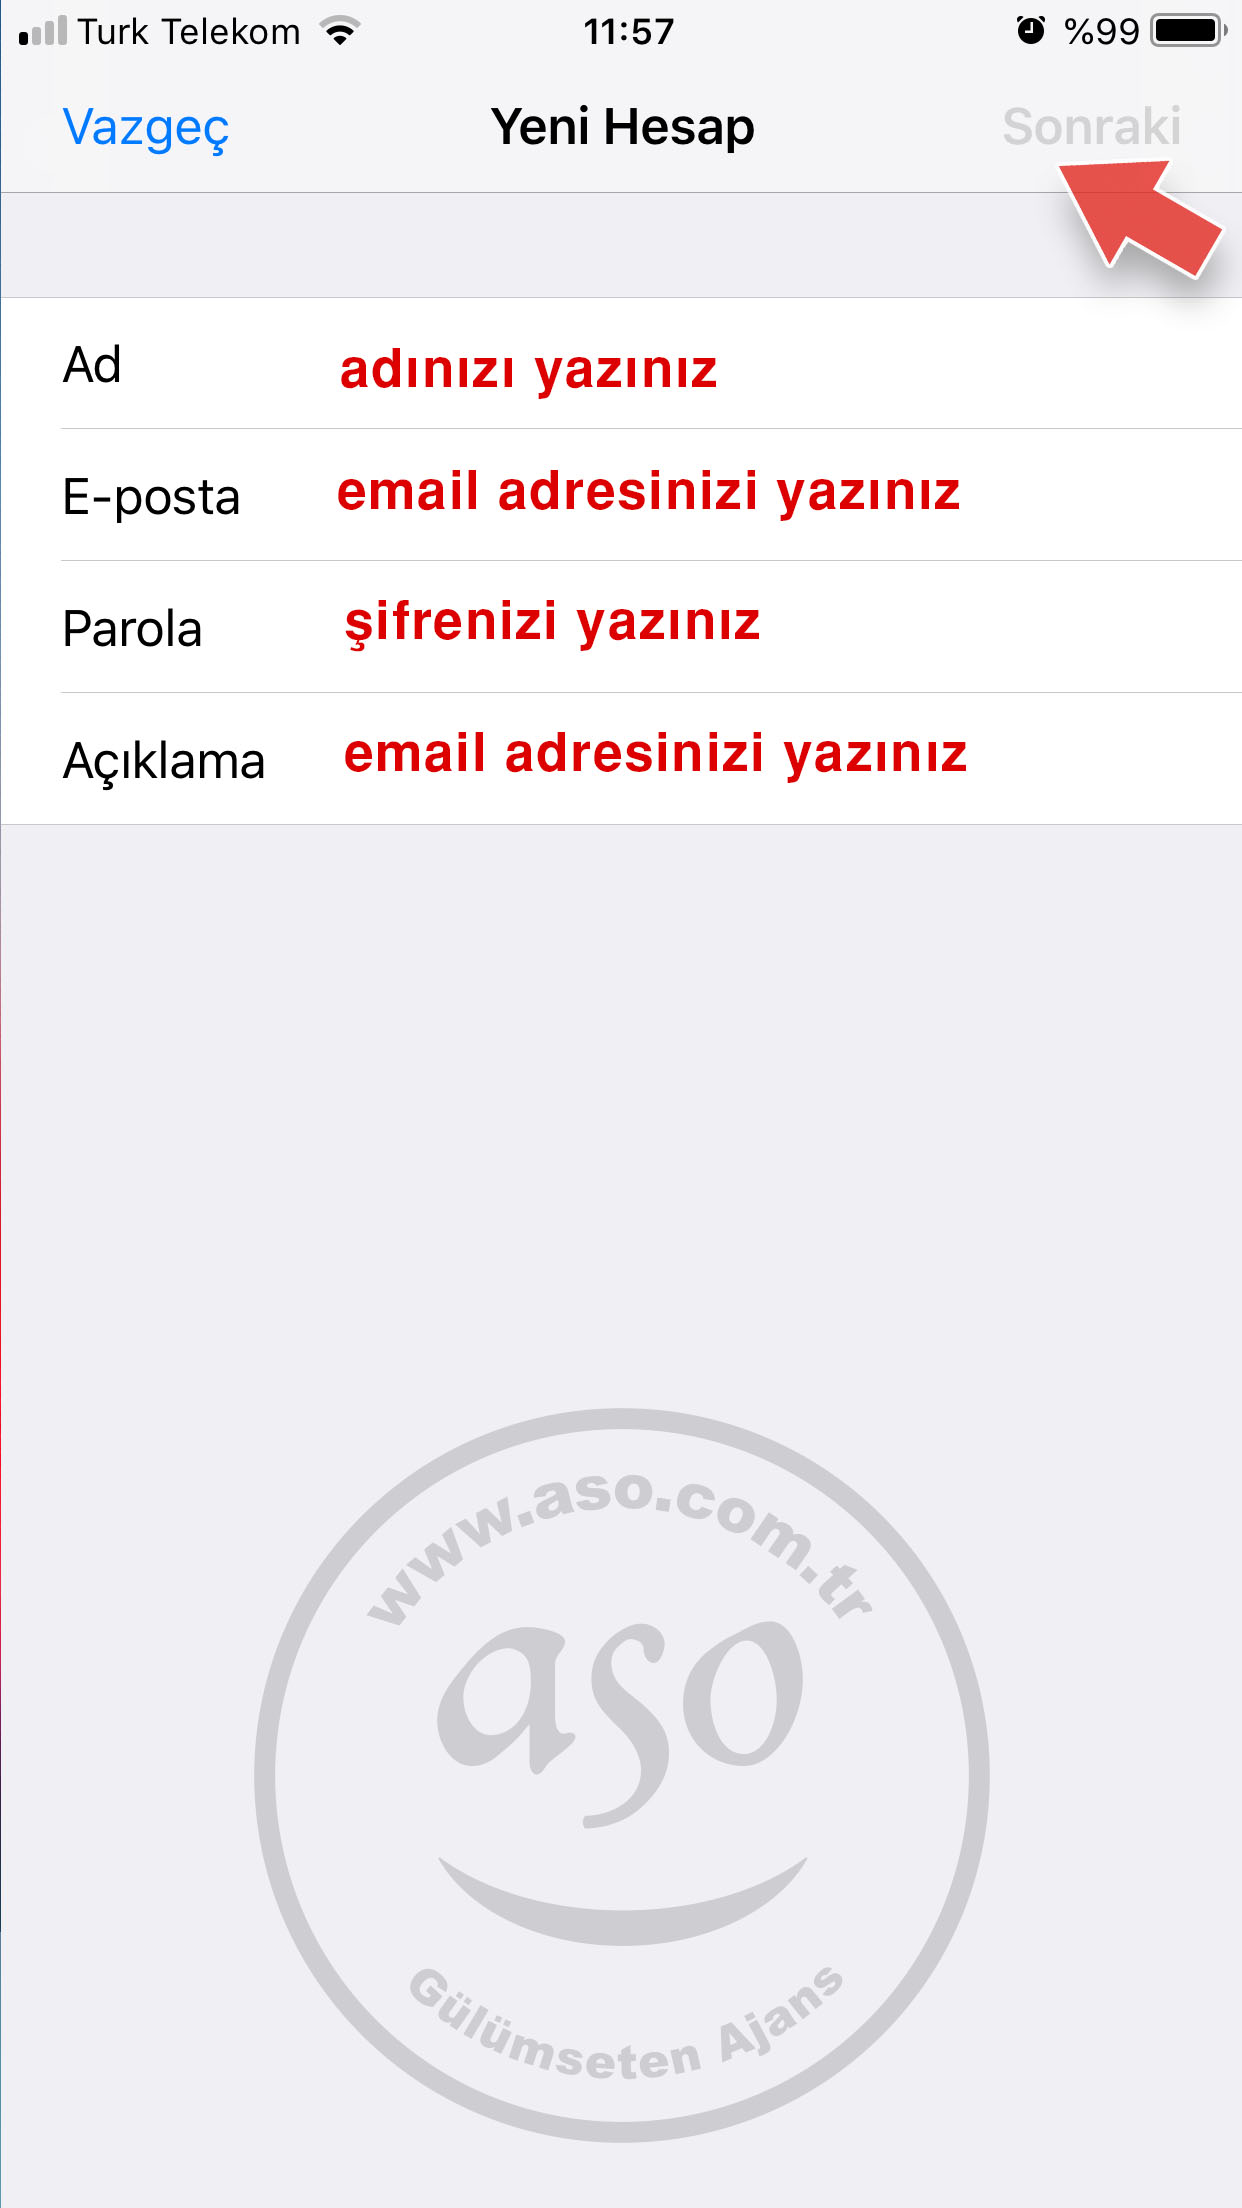
6- Fill in your name, email address, password and description with YOUR OWN INFORMATION as in the example and tap “Next“.
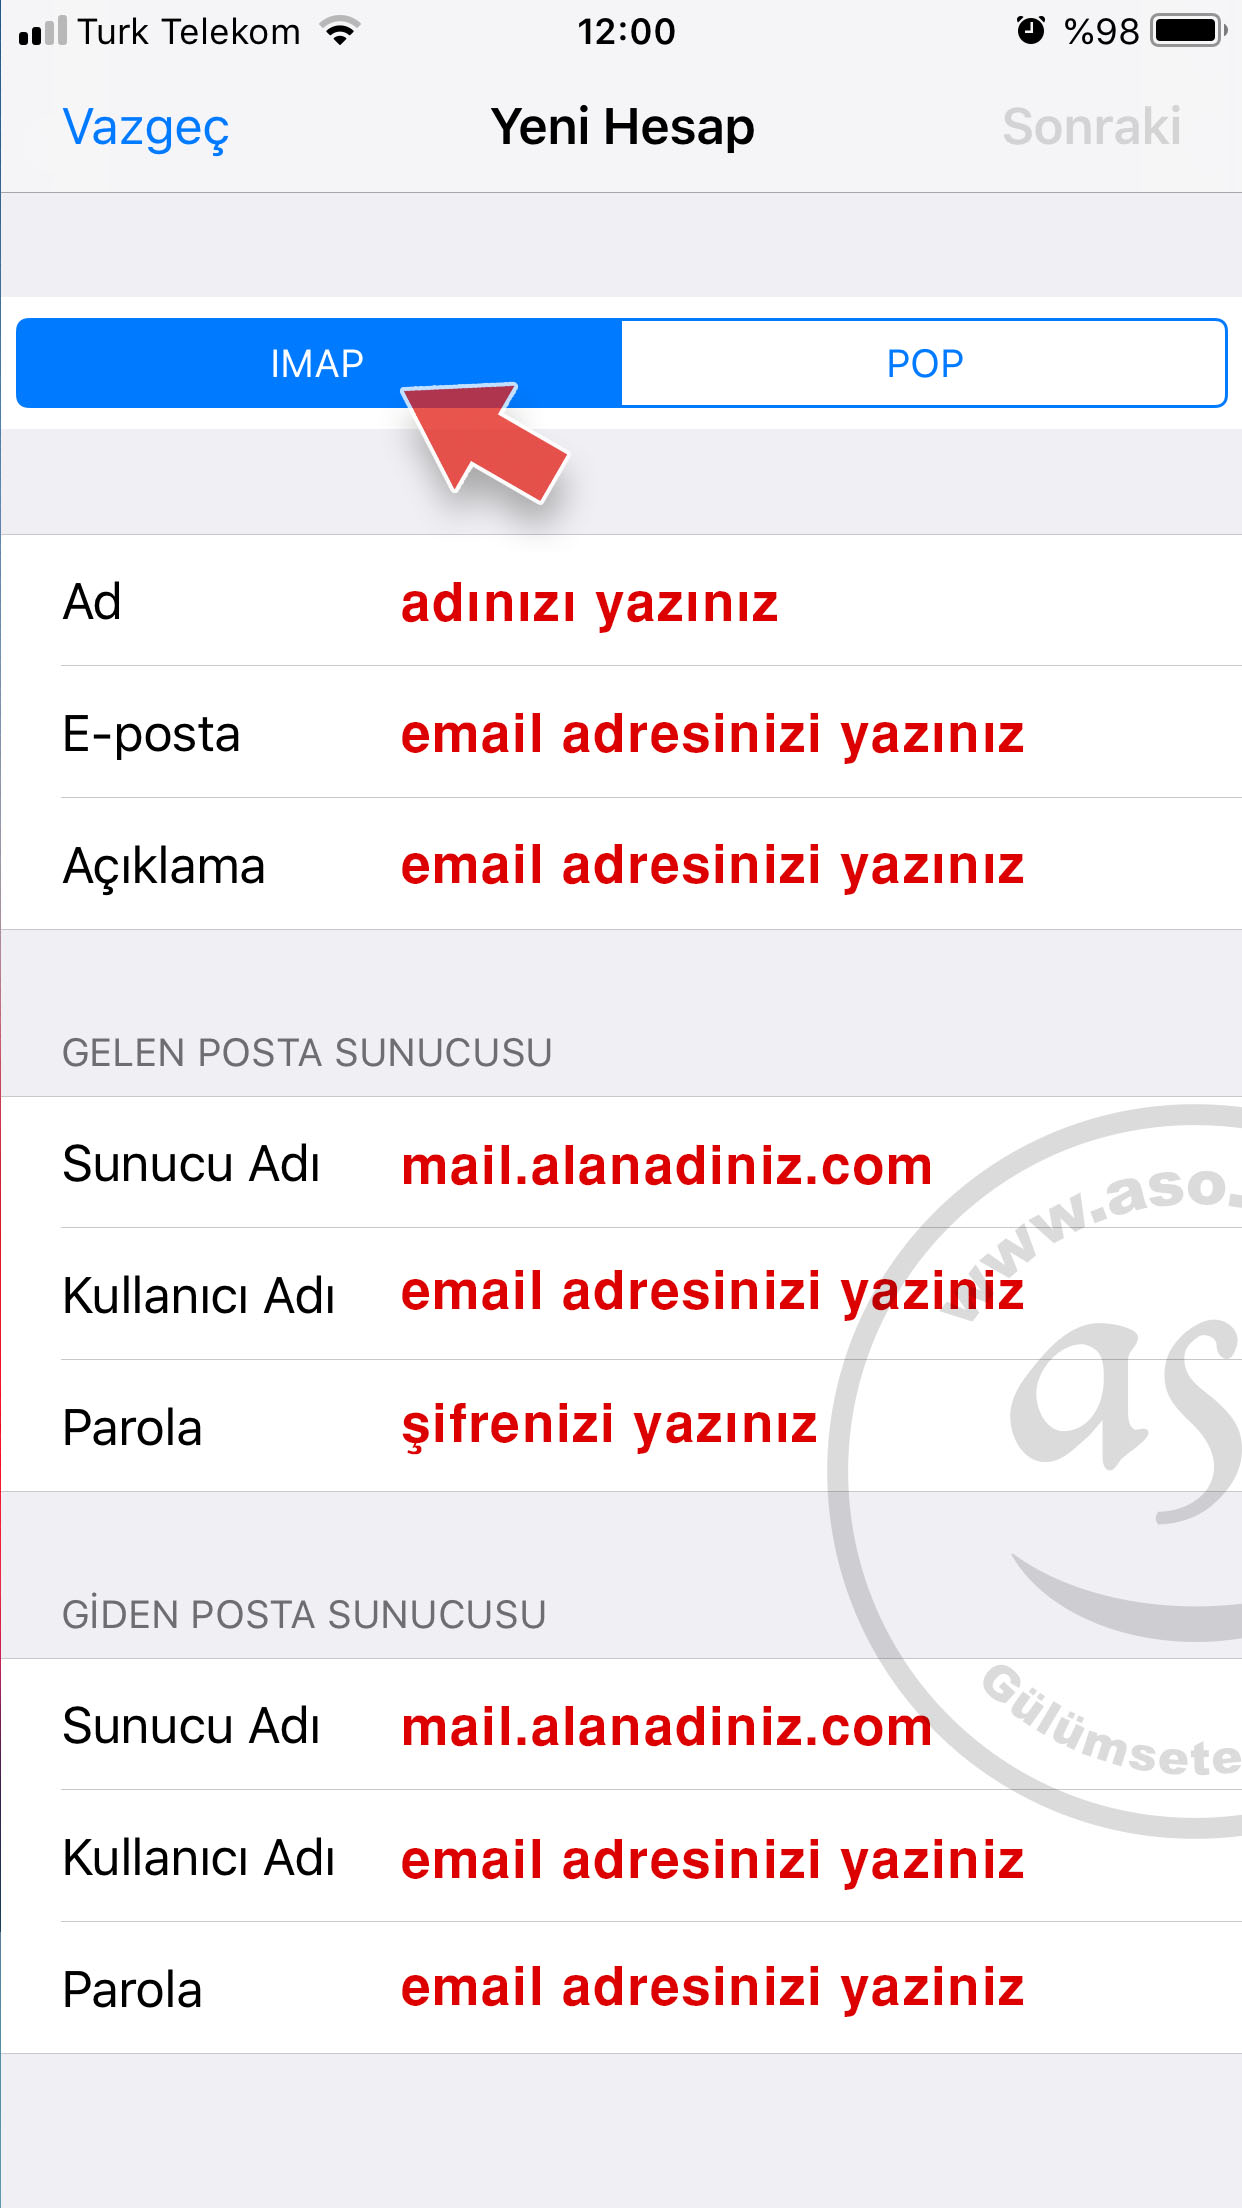
7- In the window that appears, select the “IMAP” button and fill it in as follows (you can get the information from your service provider).
- Name: Type your name
- Email: type your full email address. Remark: you can leave blank or write your email address
Incoming Mail server
- Server Name: mail.alanadaniz.com (e.g. if your address is [email protected], your server name is mail.elmaci.com).
- Username: Enter your full email address.
- Password: your password is case sensitive. Type it carefully.
Outgoing Mail Server is the same as the information above.
After filling in all the information, tap NEXT.
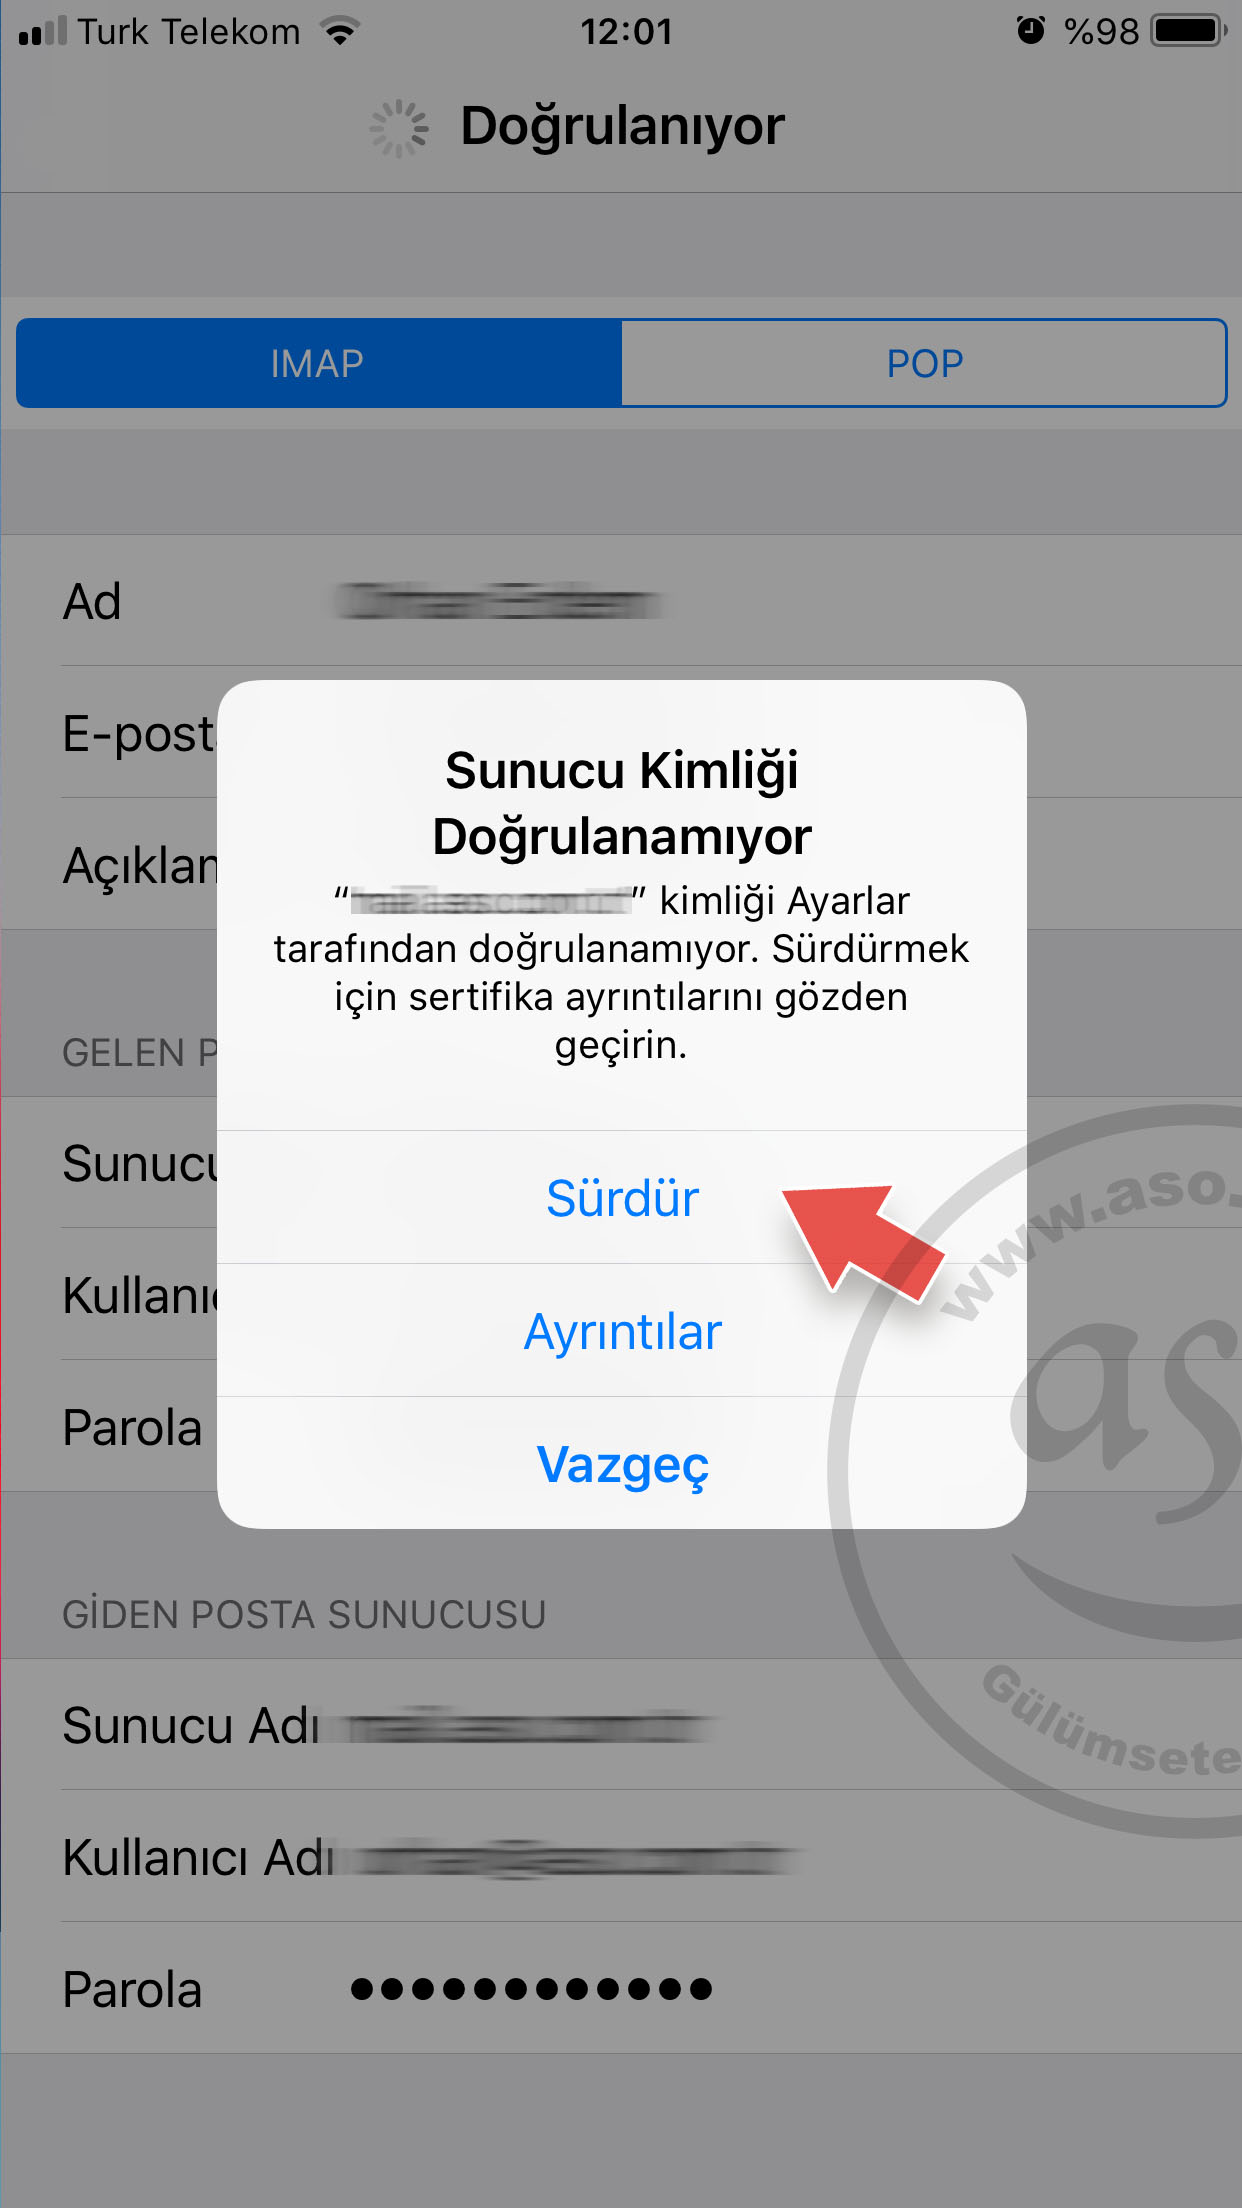
It may give a warning “Unable to verify Server ID“. Tap “CONTINUE” to confirm the SSL certificate.
This warning may also appear the first time you send an email. Again, you must confirm the SSL secure connection by clicking “Continue” or “Continue”.
Congratulations…! You have completed the installation.
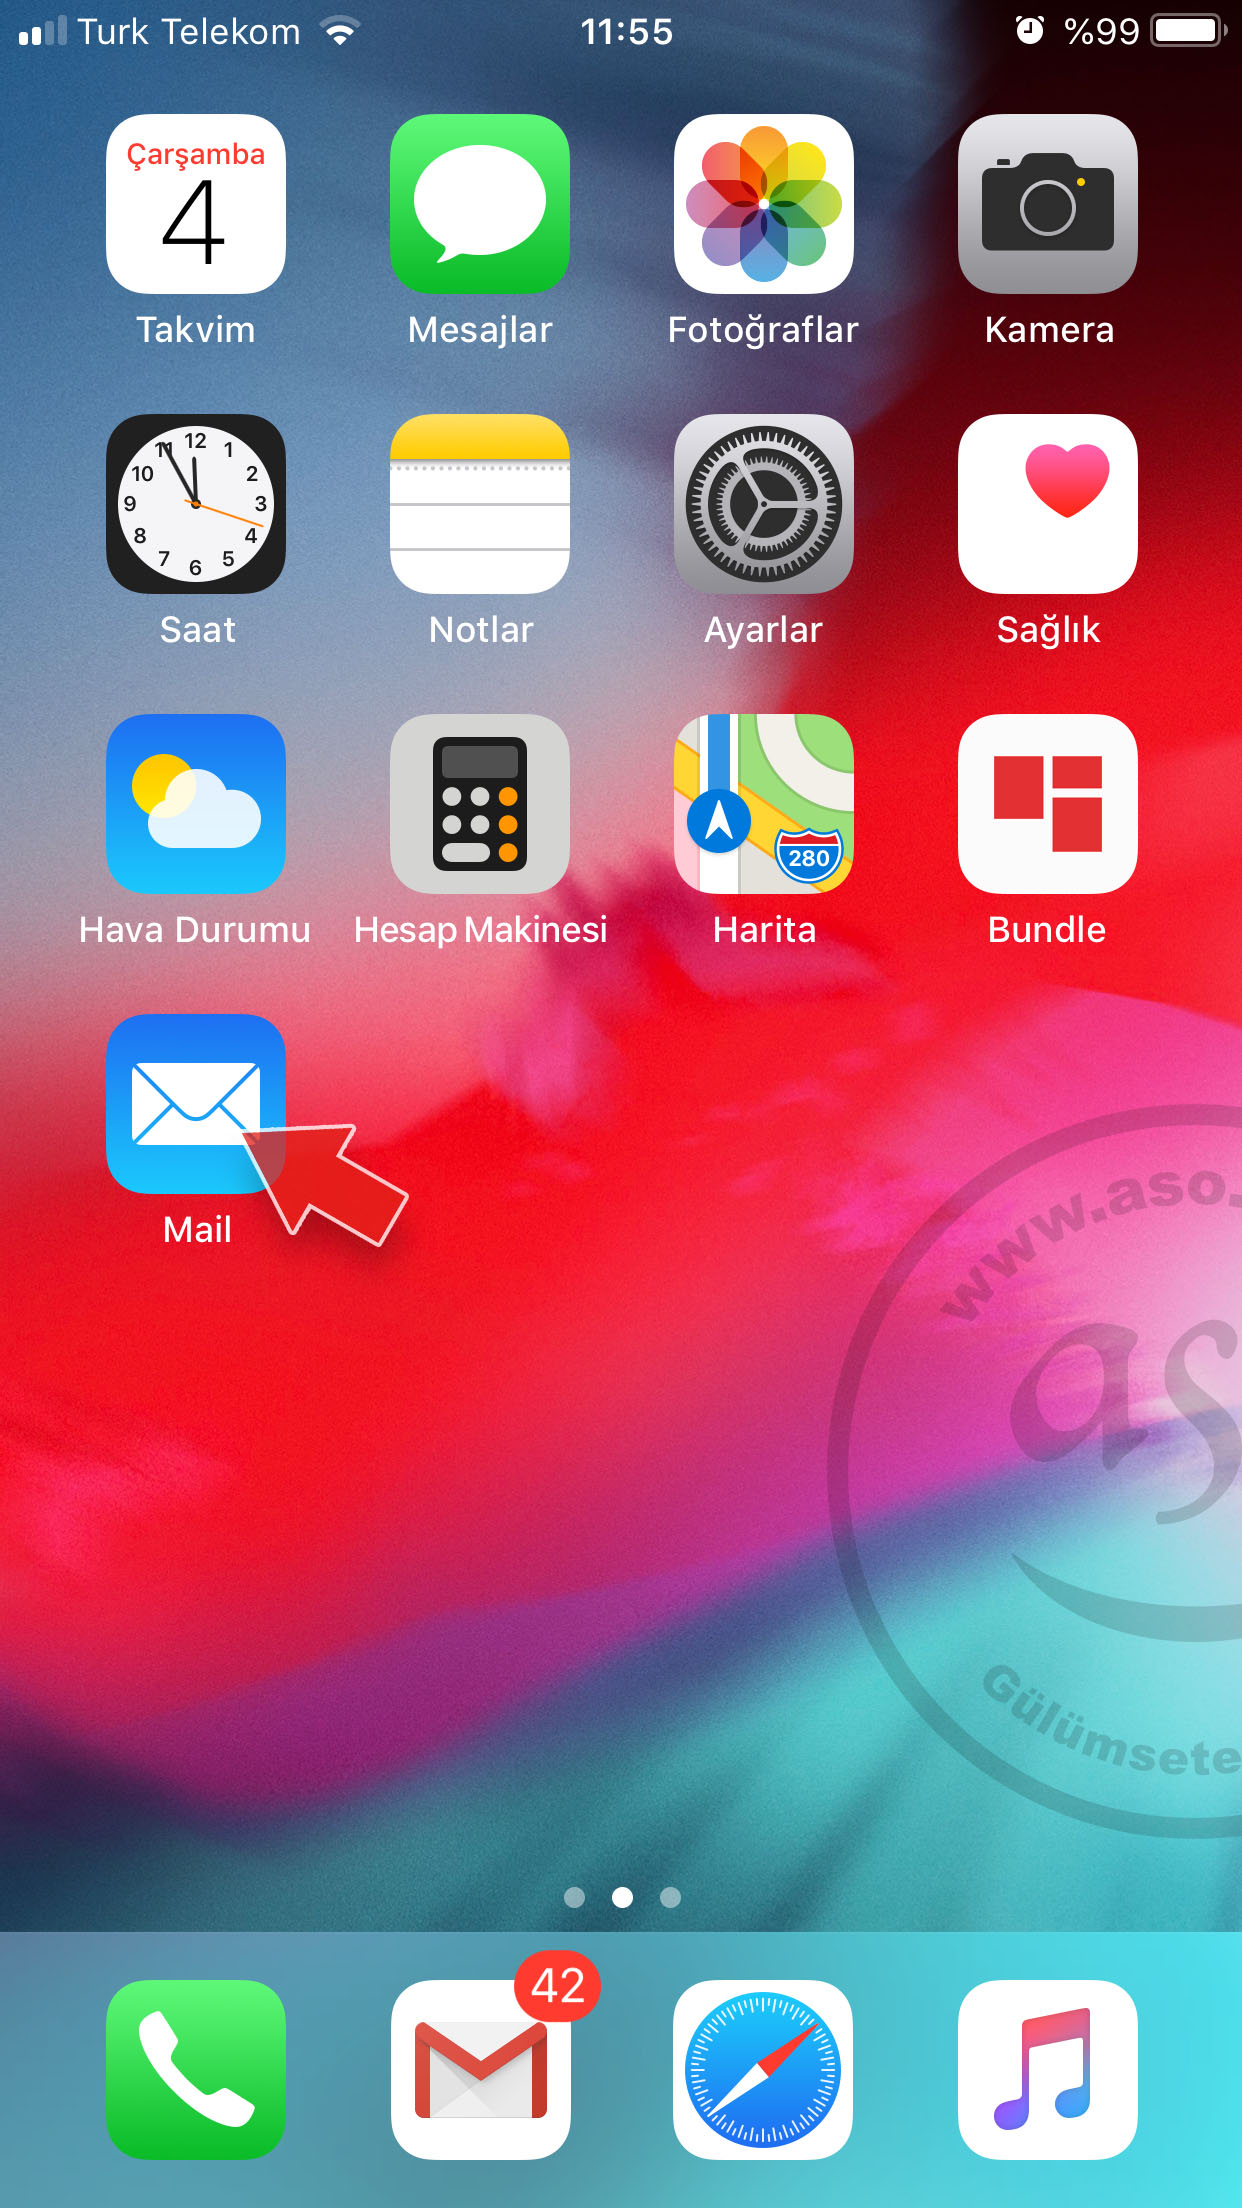
Switch to the home screen of your iPhone and tap the E-mail icon.
You can start receiving and sending emails.
So far, you have set up the e-mail address of your company or your own domain name.
Gmail, Yahoo Mail, Hotmail, Hotmail, Aol, Outlook, Exchange installation is not that complicated. you can install these e-mails on your Iphone in one step.
Gmail setup on iPhone;
Under Home > Settings > Mail, Contacts, Calendars > Accounts, click the GMAIL button.
type your name, email address, password. You can write your name in the description. click the save button. That’s all. Other e-mail setups are also like this.
Note: If you are using 2-step security verification for your Gmail account, you must log in to your Gmail account, create a custom password for the app and use this custom password in the password section Click here for help.
Here’s a suggestion if you use email from your iPhone;
Get a free email address from www.gmail.com or www.yahoo.com. Forward a copy of your company’s emails to this email address.
With Gmail’s capacity of about 15 GB and Yahoo mail’s capacity of 1 TB (you read that right, 1000 GB), you will have a copy of all your company e-mails backed up and archived here at the same time. In case your computer crashes and your mails are deleted, you will be able to access your old mails from here.
If you host a website on our servers and use e-mail, we provide free consultancy services for all settings, server redirection and other issues related to your Iphone.
Click here for mail settings for other devices and e-mail programs.
Comments (0)