iPhone Email Setup (Illustrated settings) for iOS 14 and above
iPhone Email Setup Settings applies to iOS 14 and later.
It is very easy to set up on your phone with your email address and password. You can set up mail by applying the settings below for iOS 14 and above.
We will install as IMAP (This allows you to keep your mail on the server. It takes up less space on your phone)
(Some servers may require different port and server settings. However, it is valid for 99% of servers including our servers).
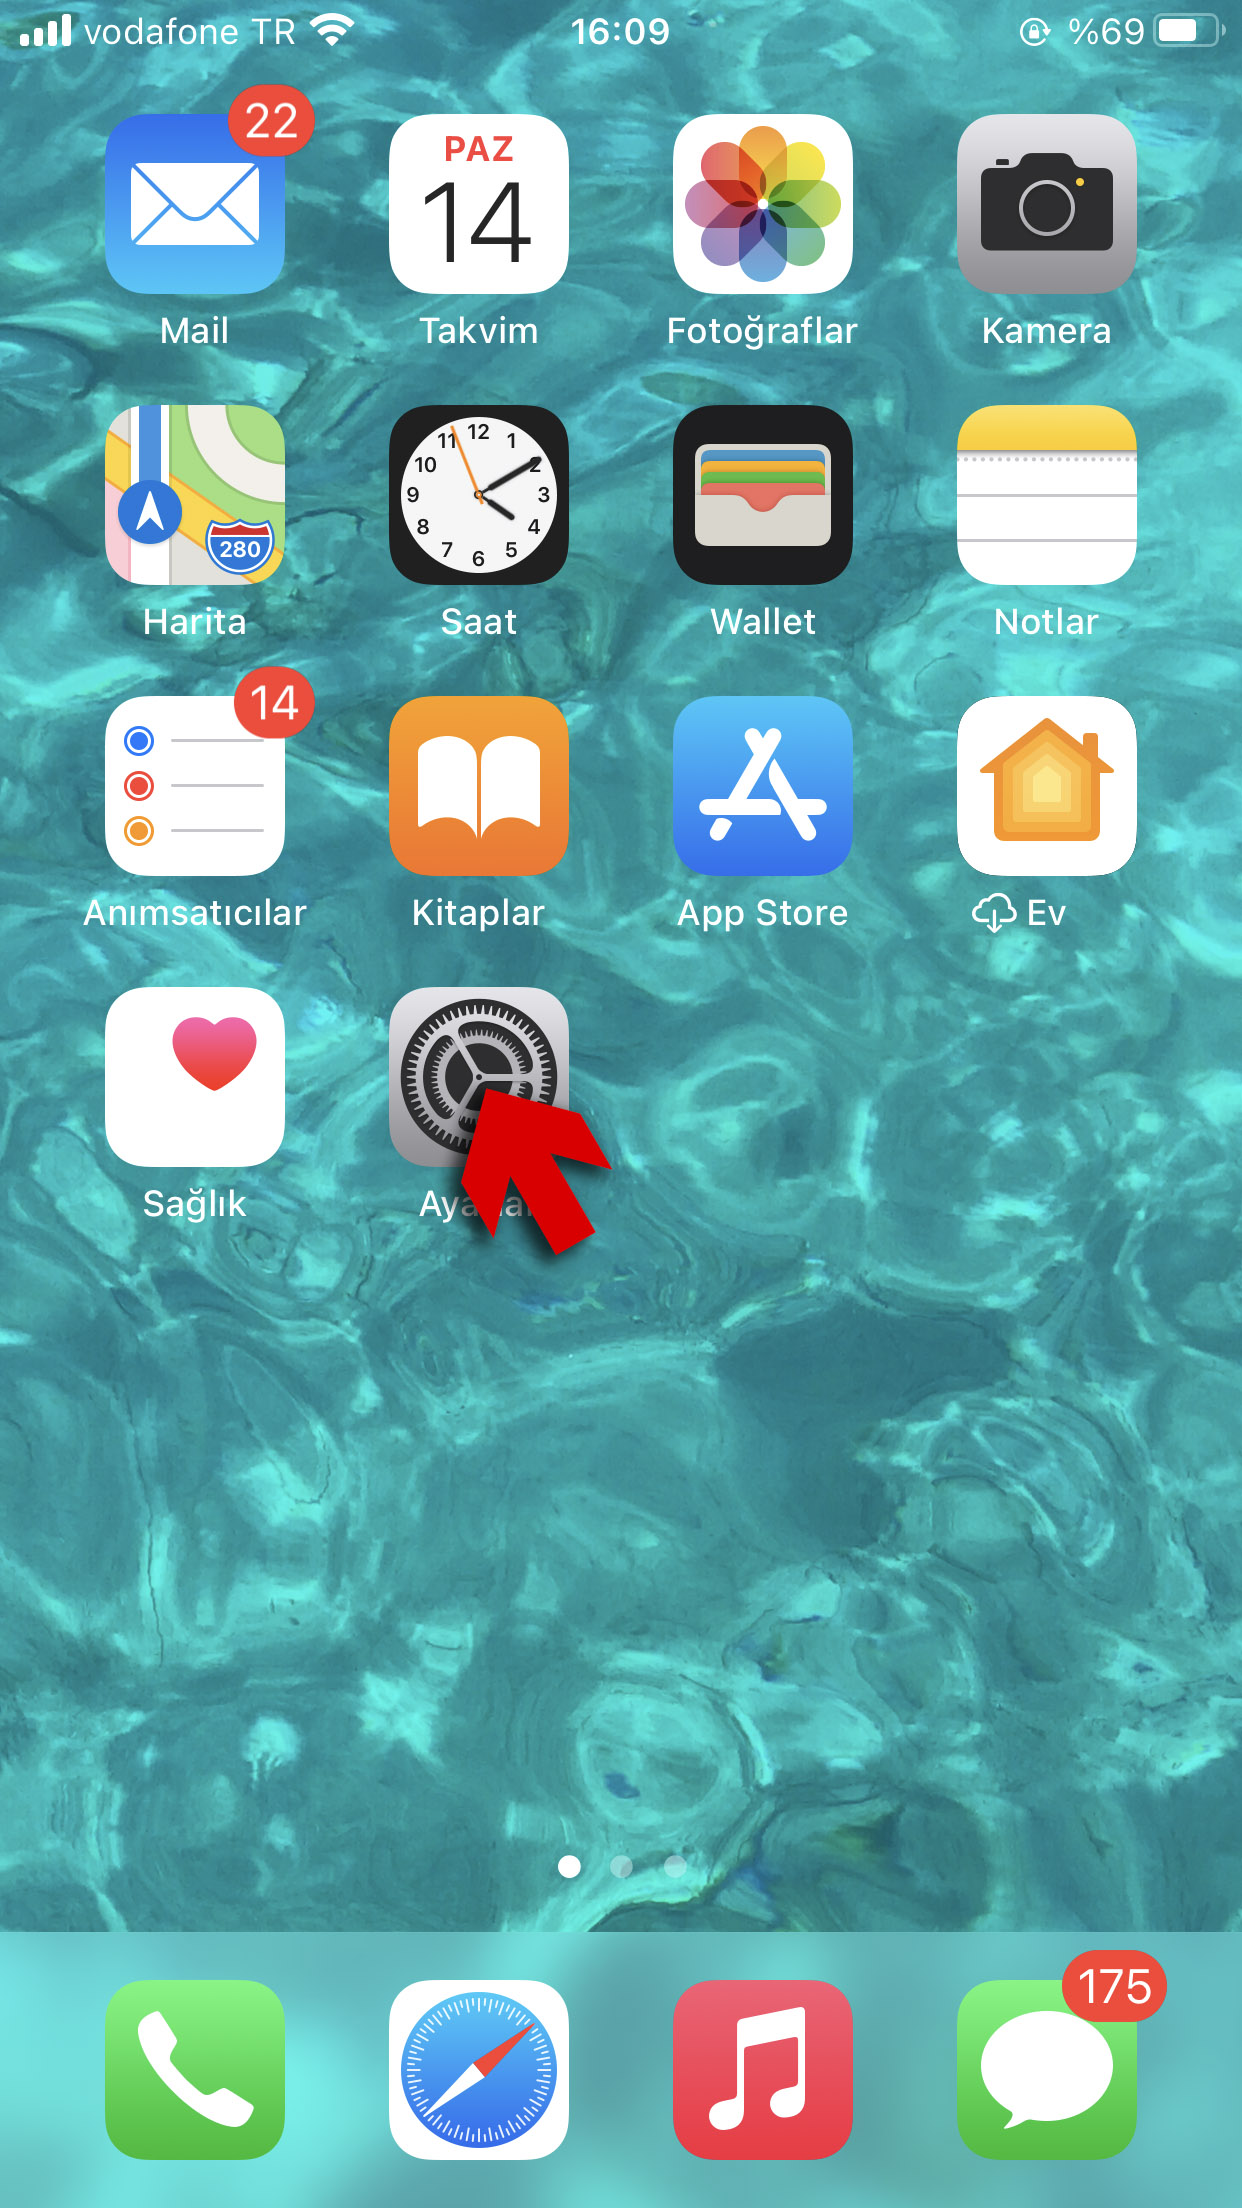
Enter Settings from the iPhone home screen.
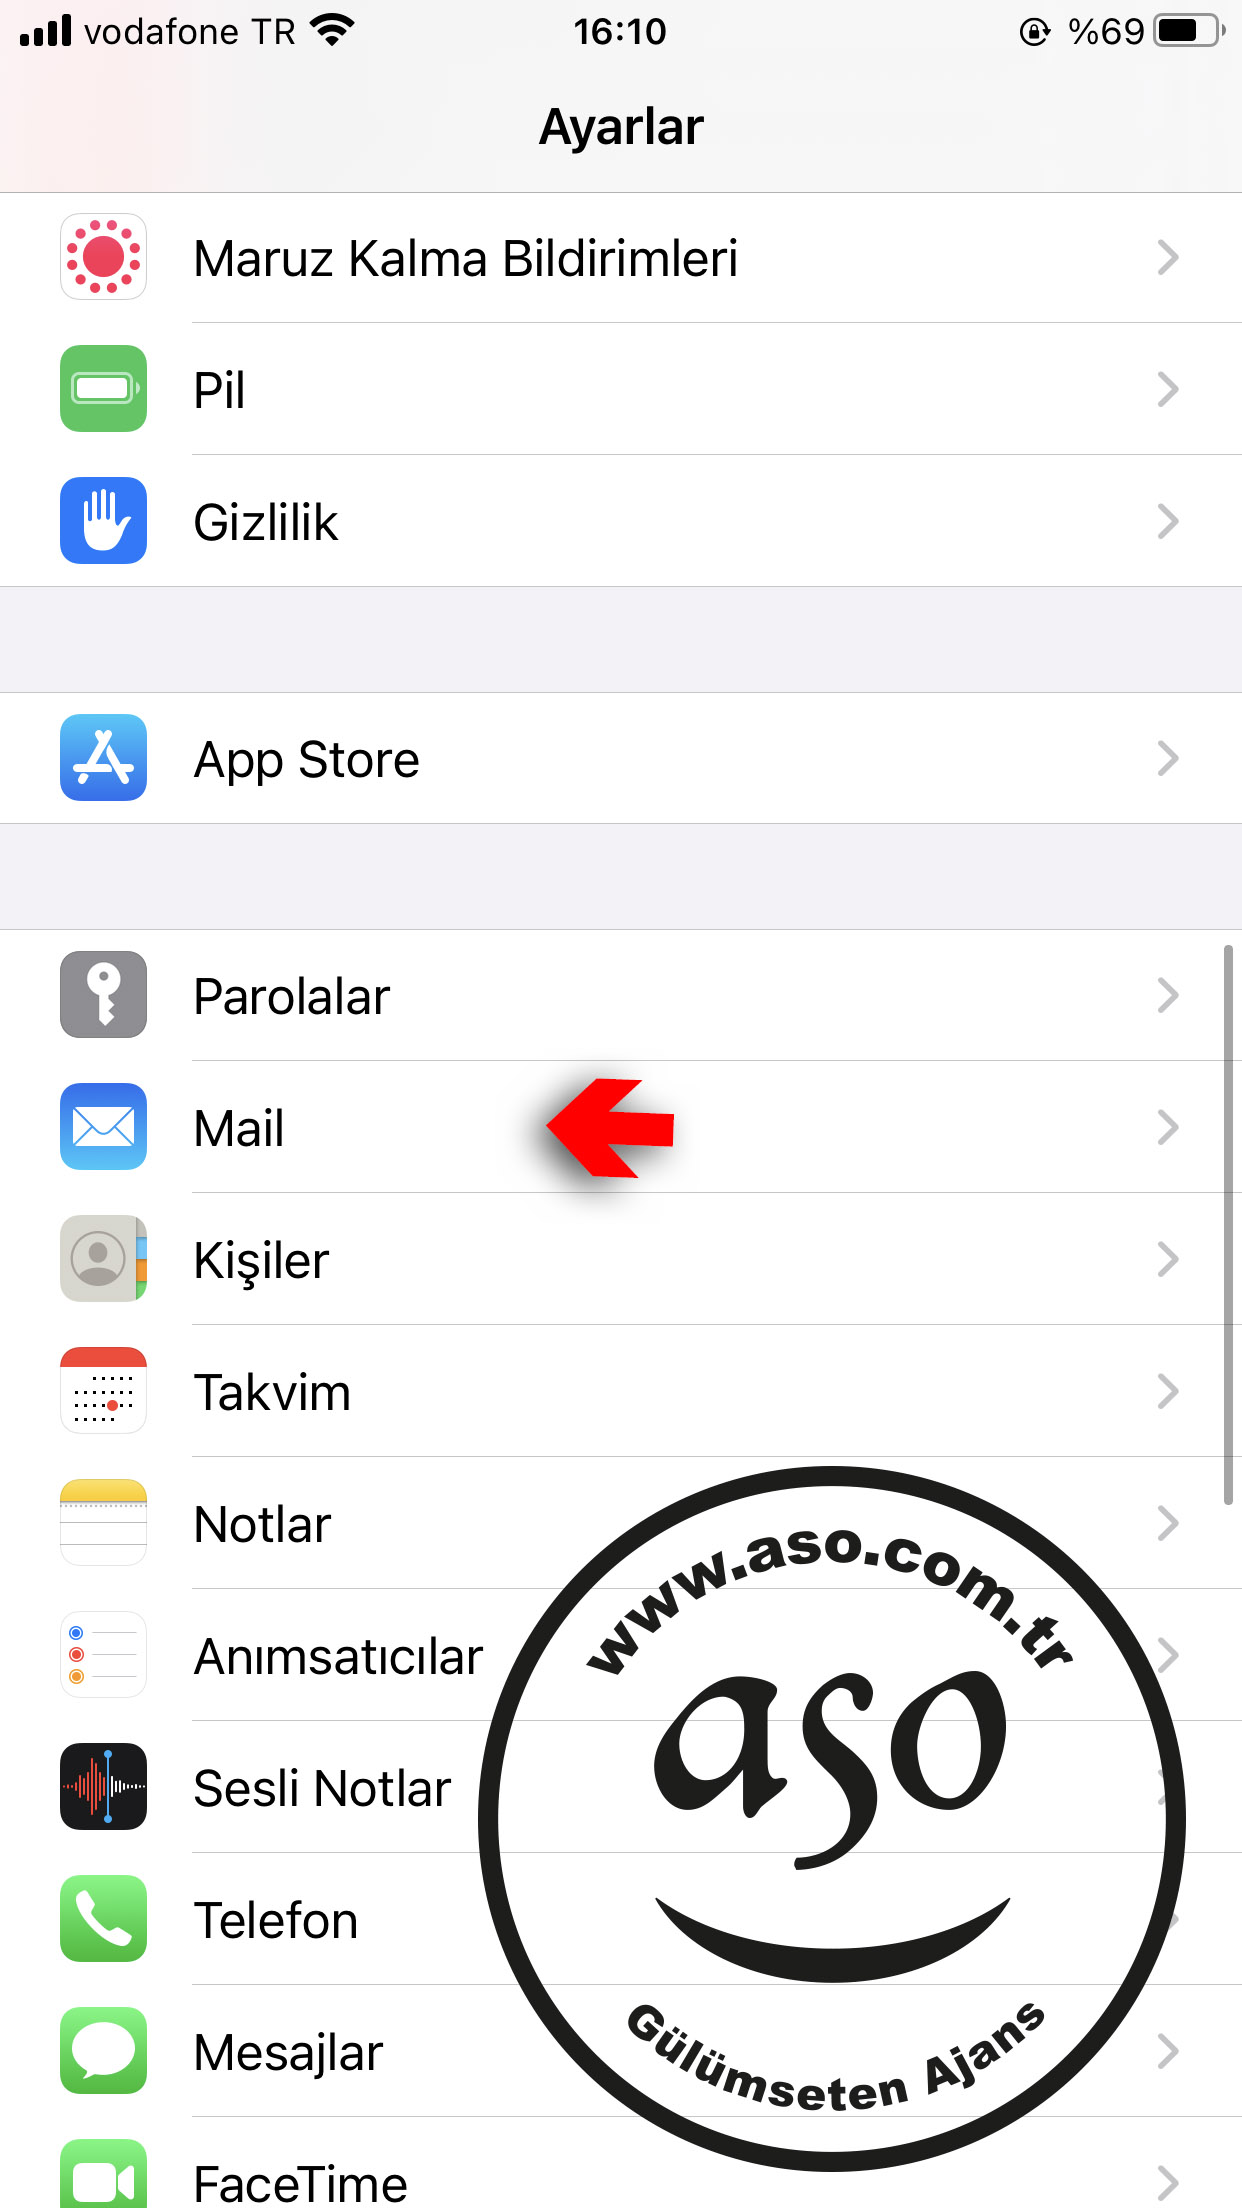
Tap the Mail icon.
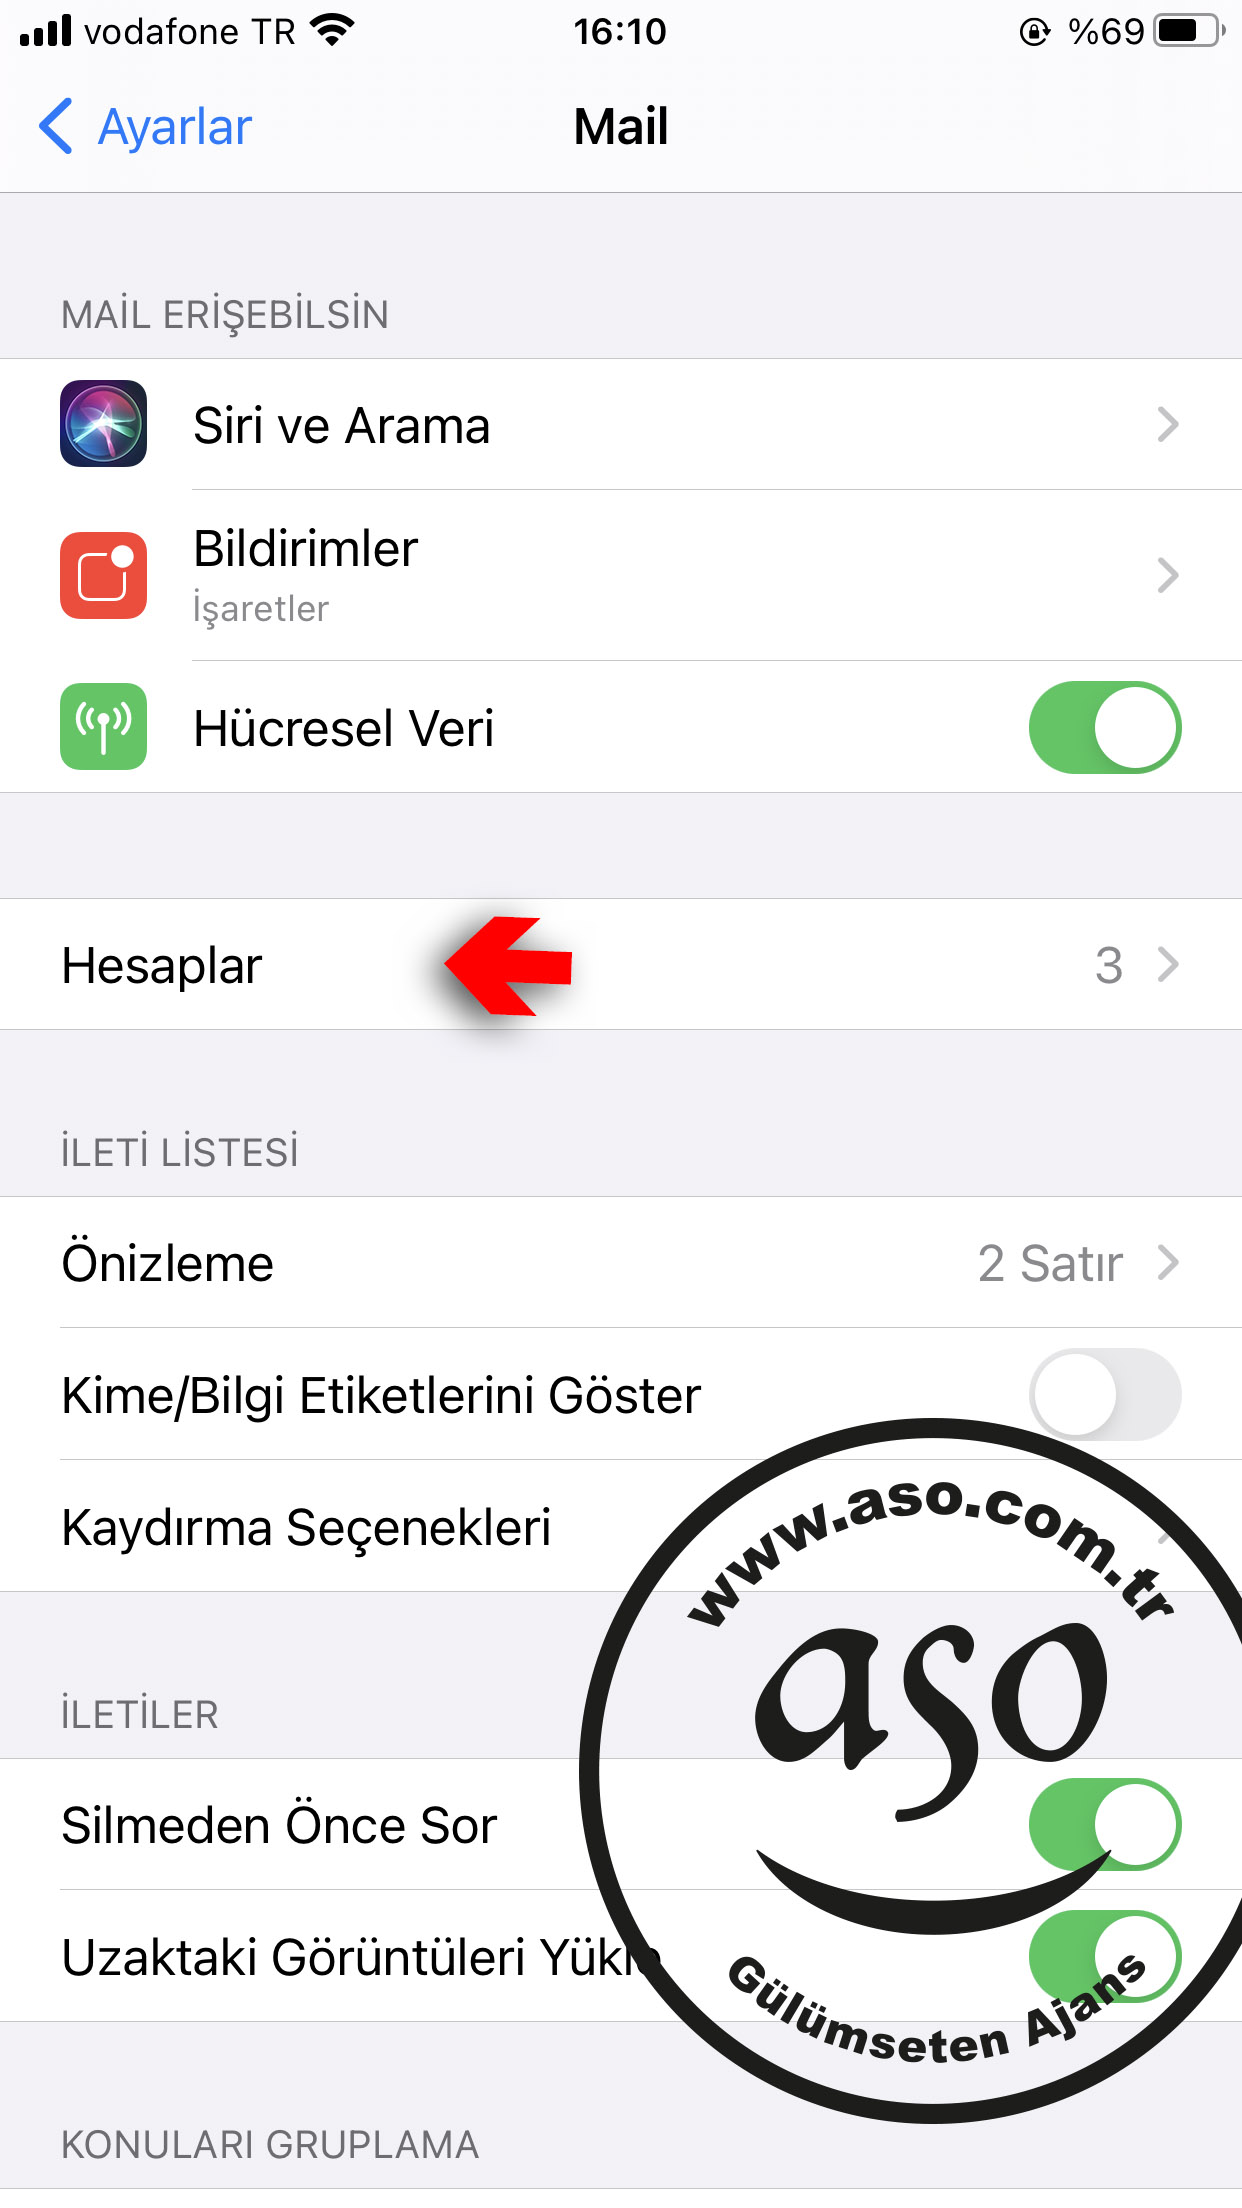
Tap Accounts.
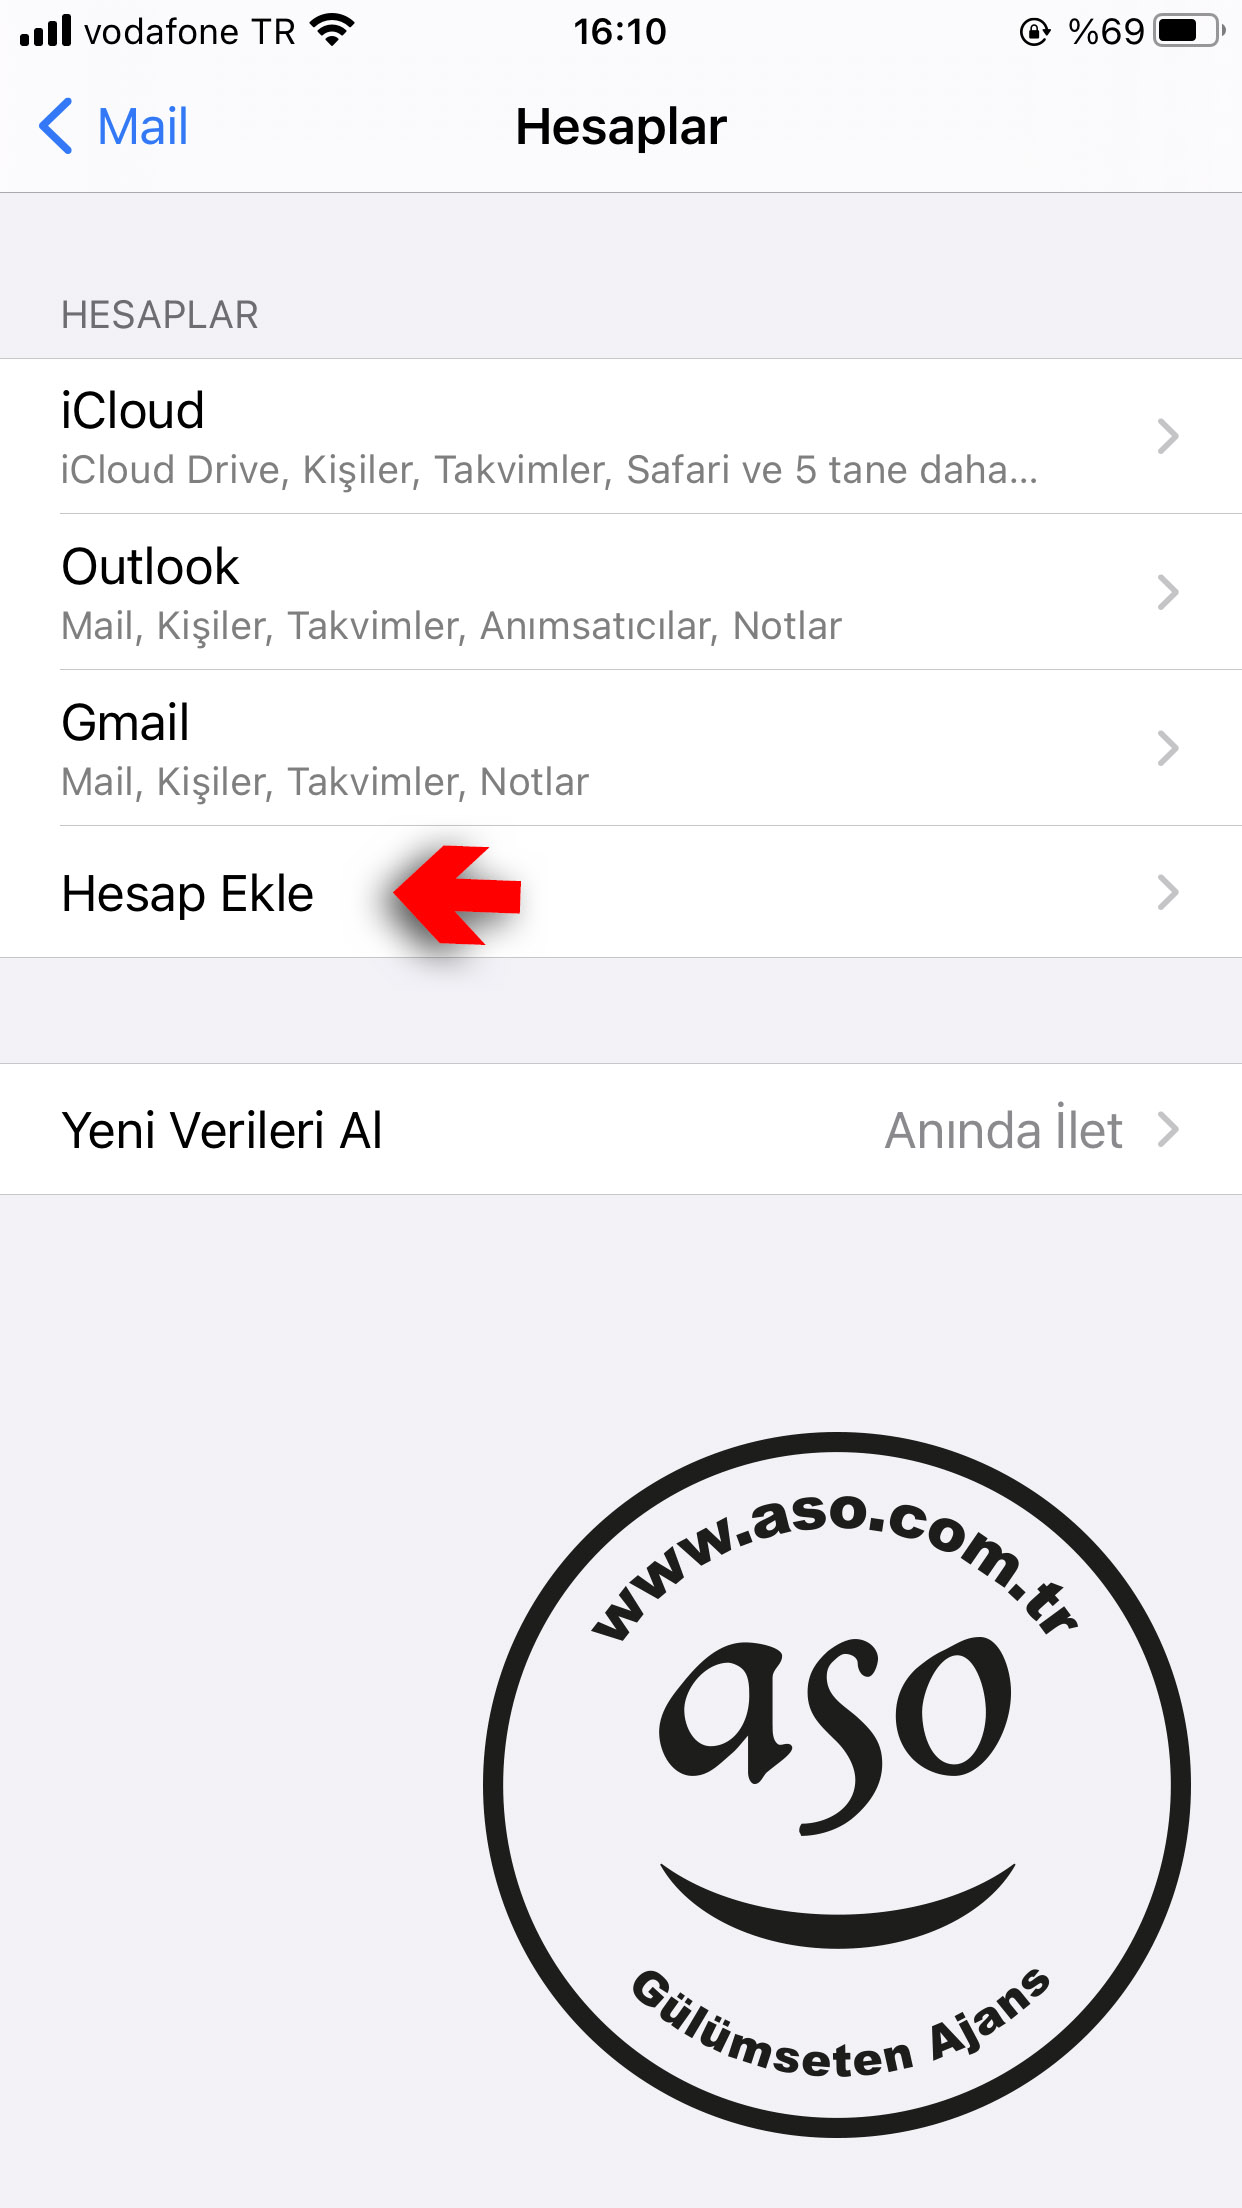
Tap Add Account.
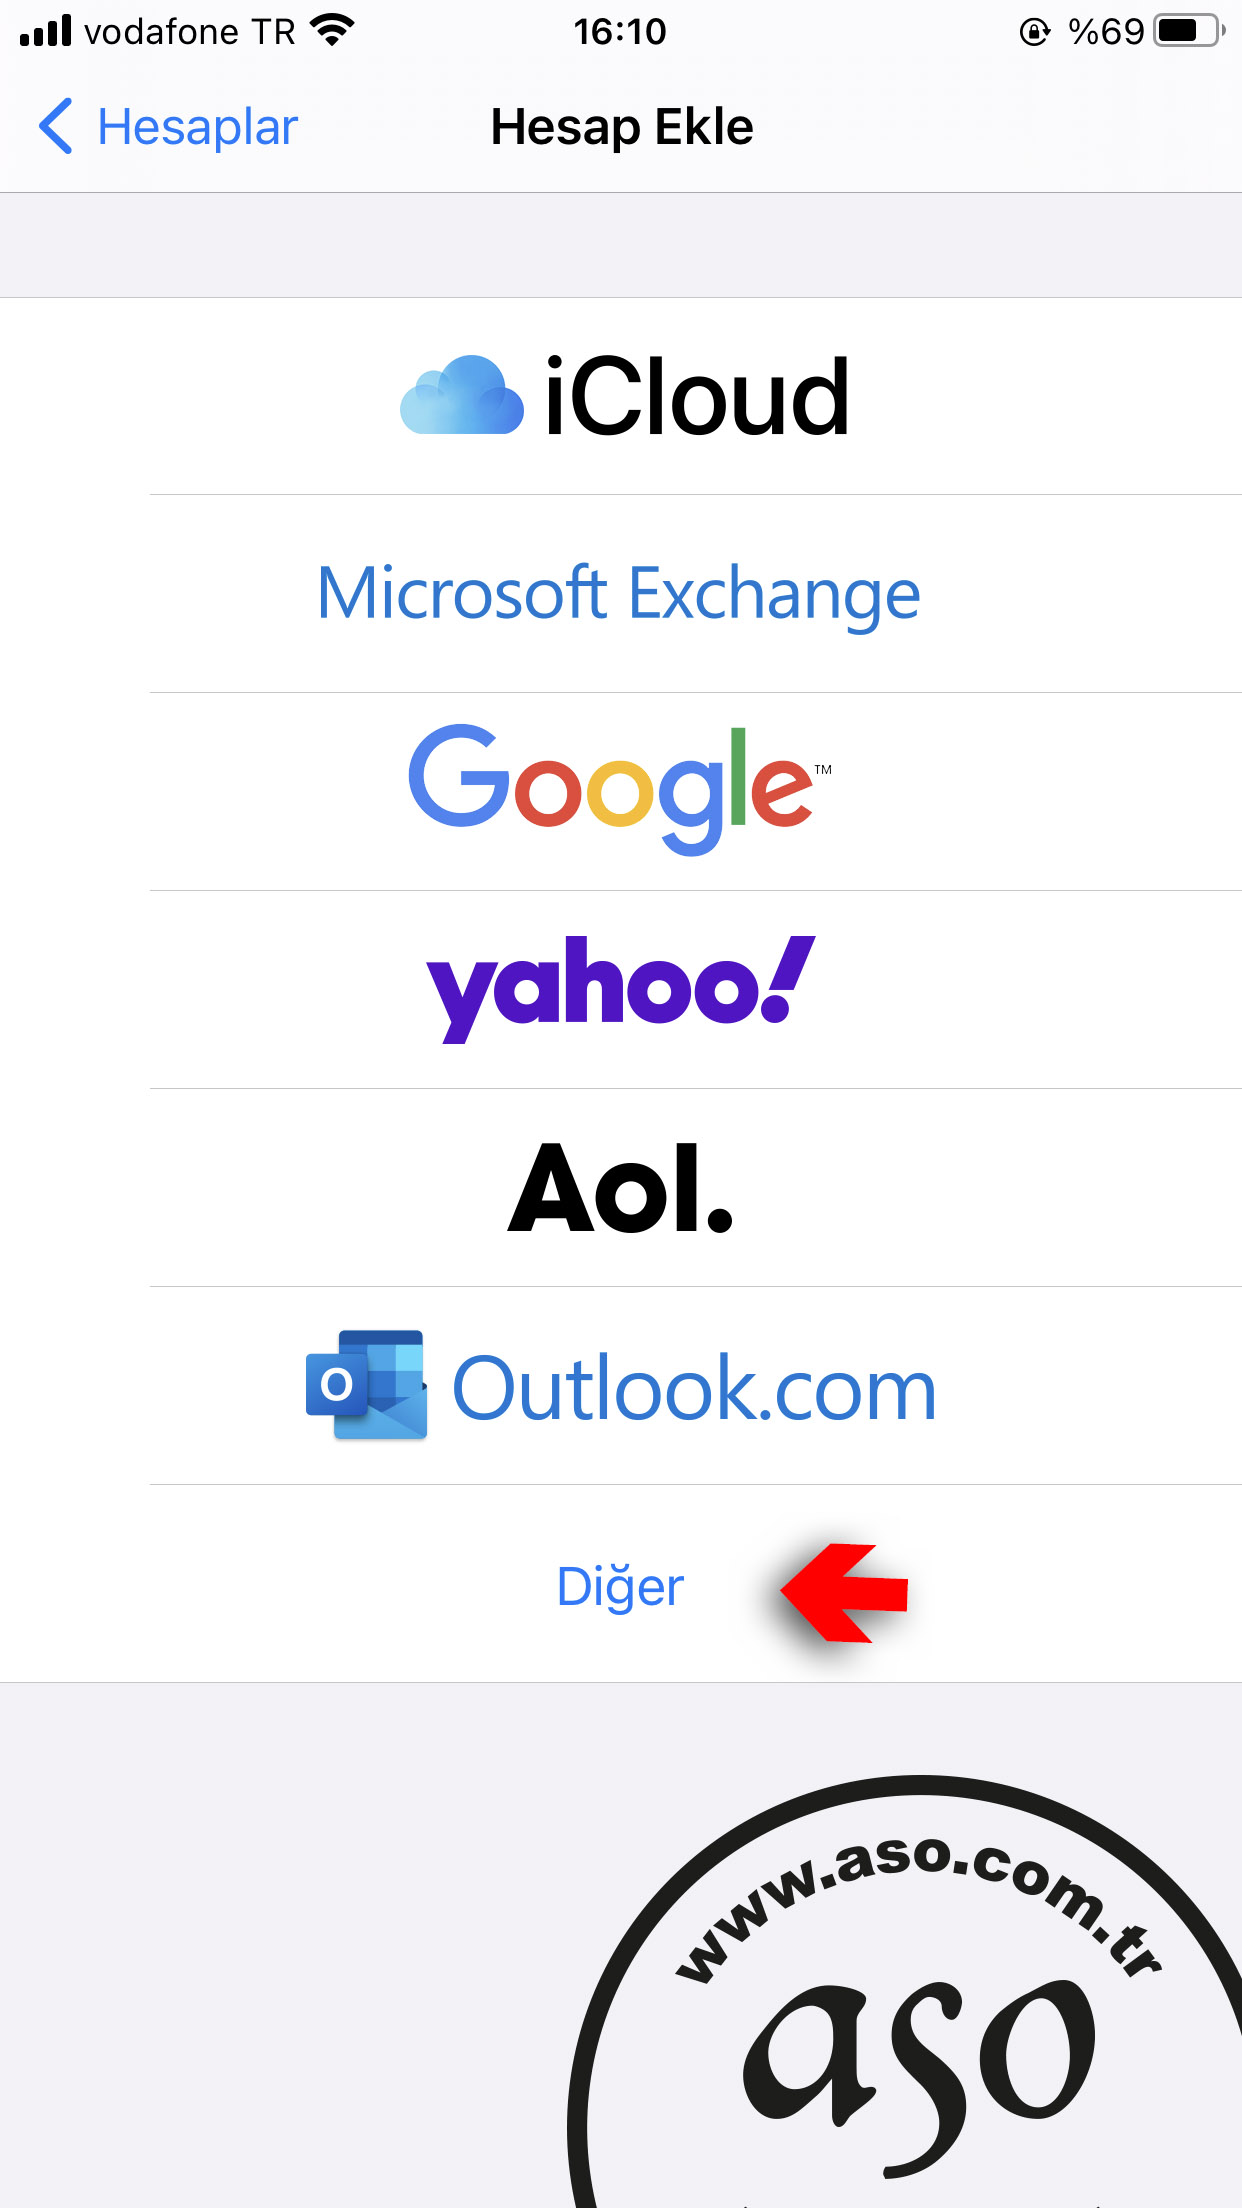
Tap Other
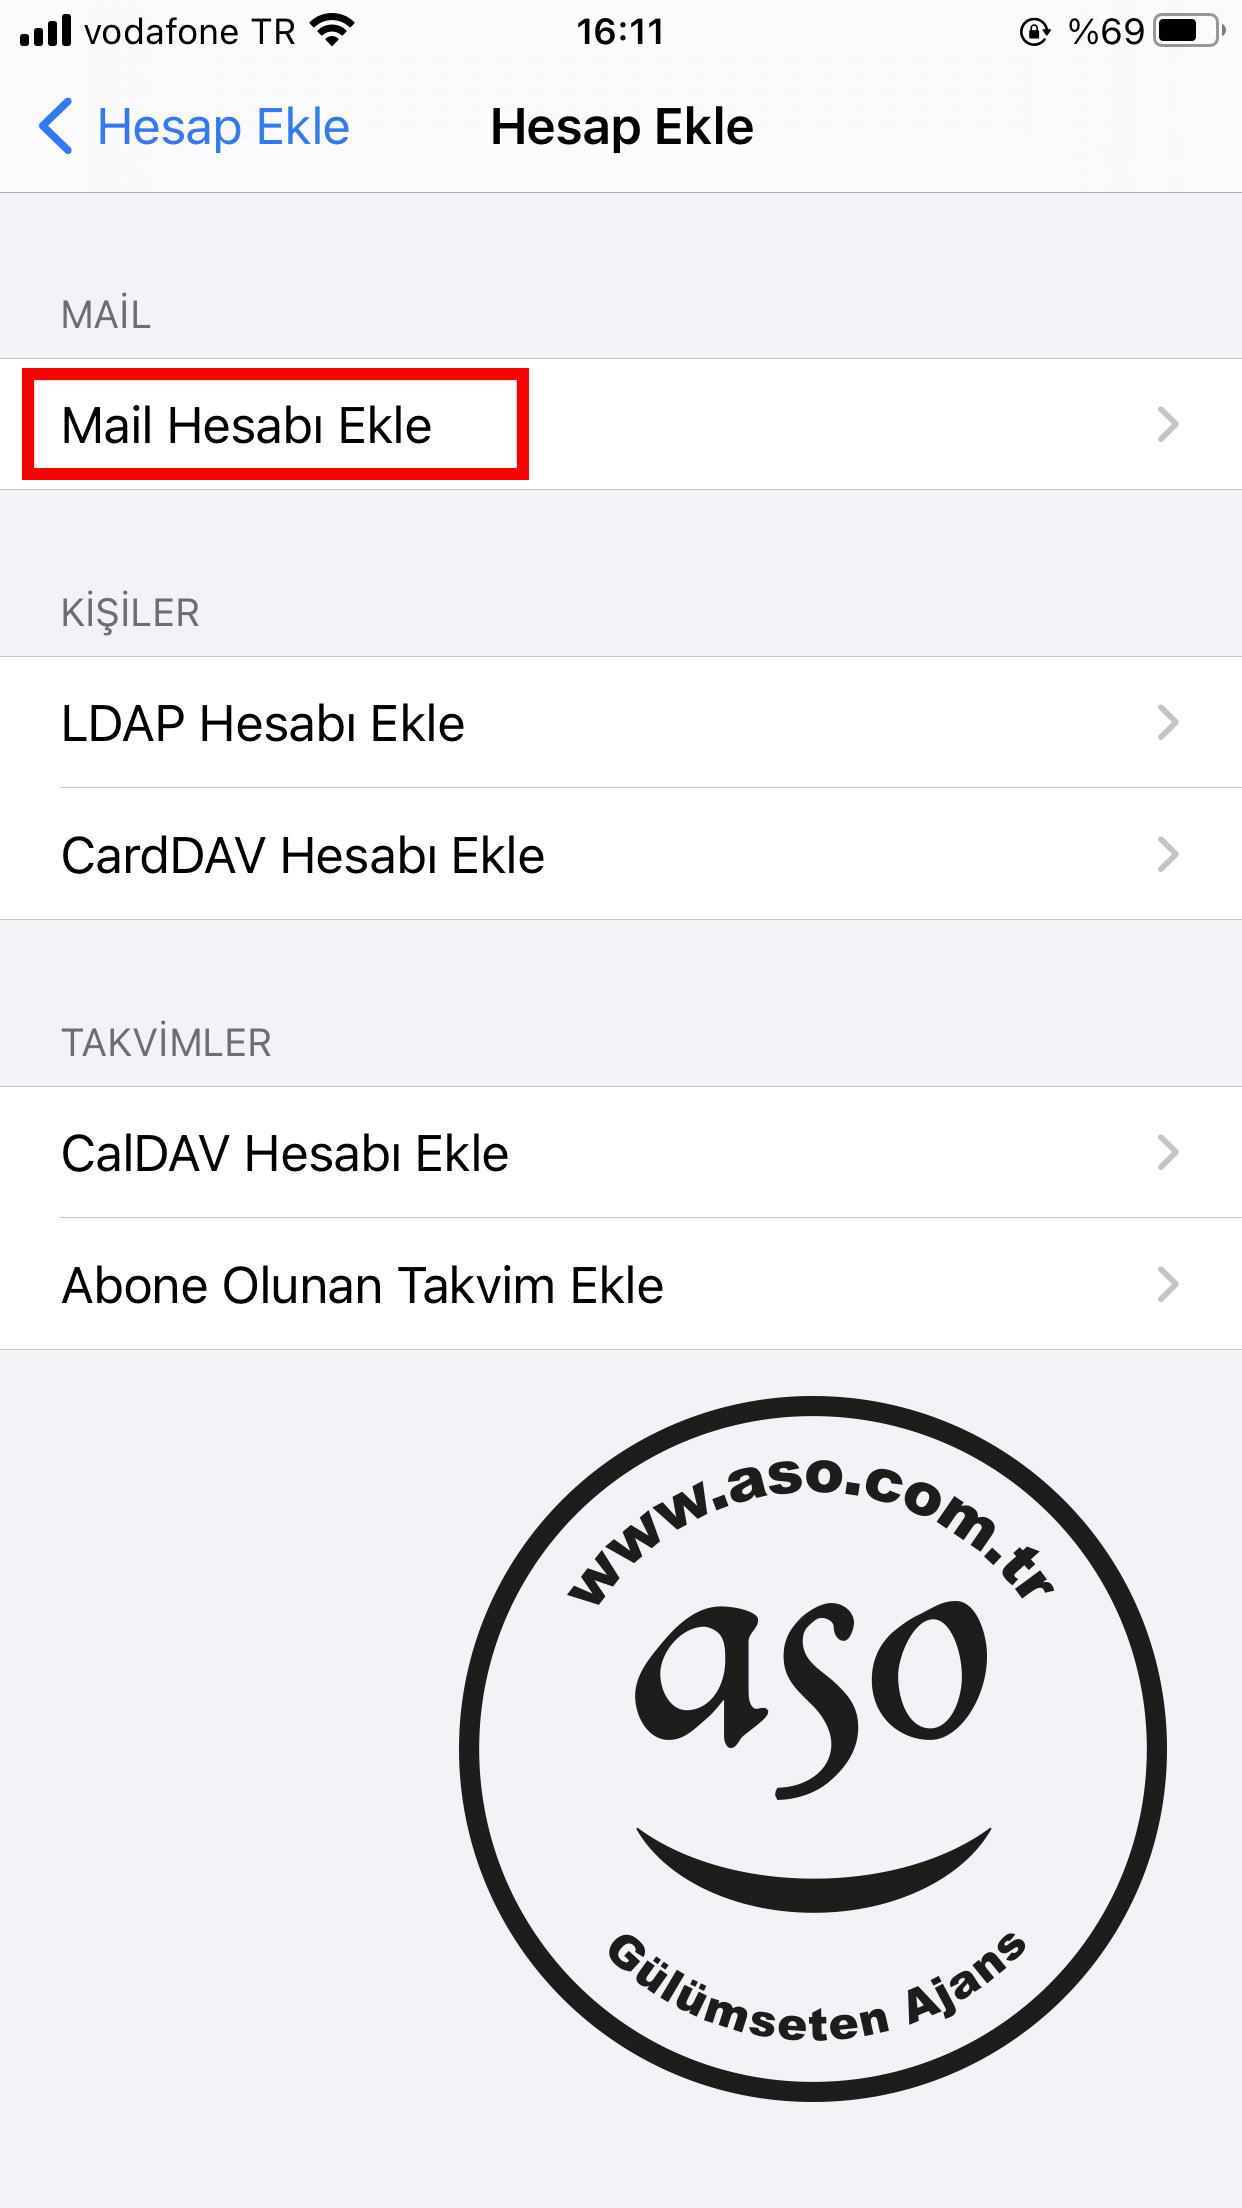
Tap Add Mail Account
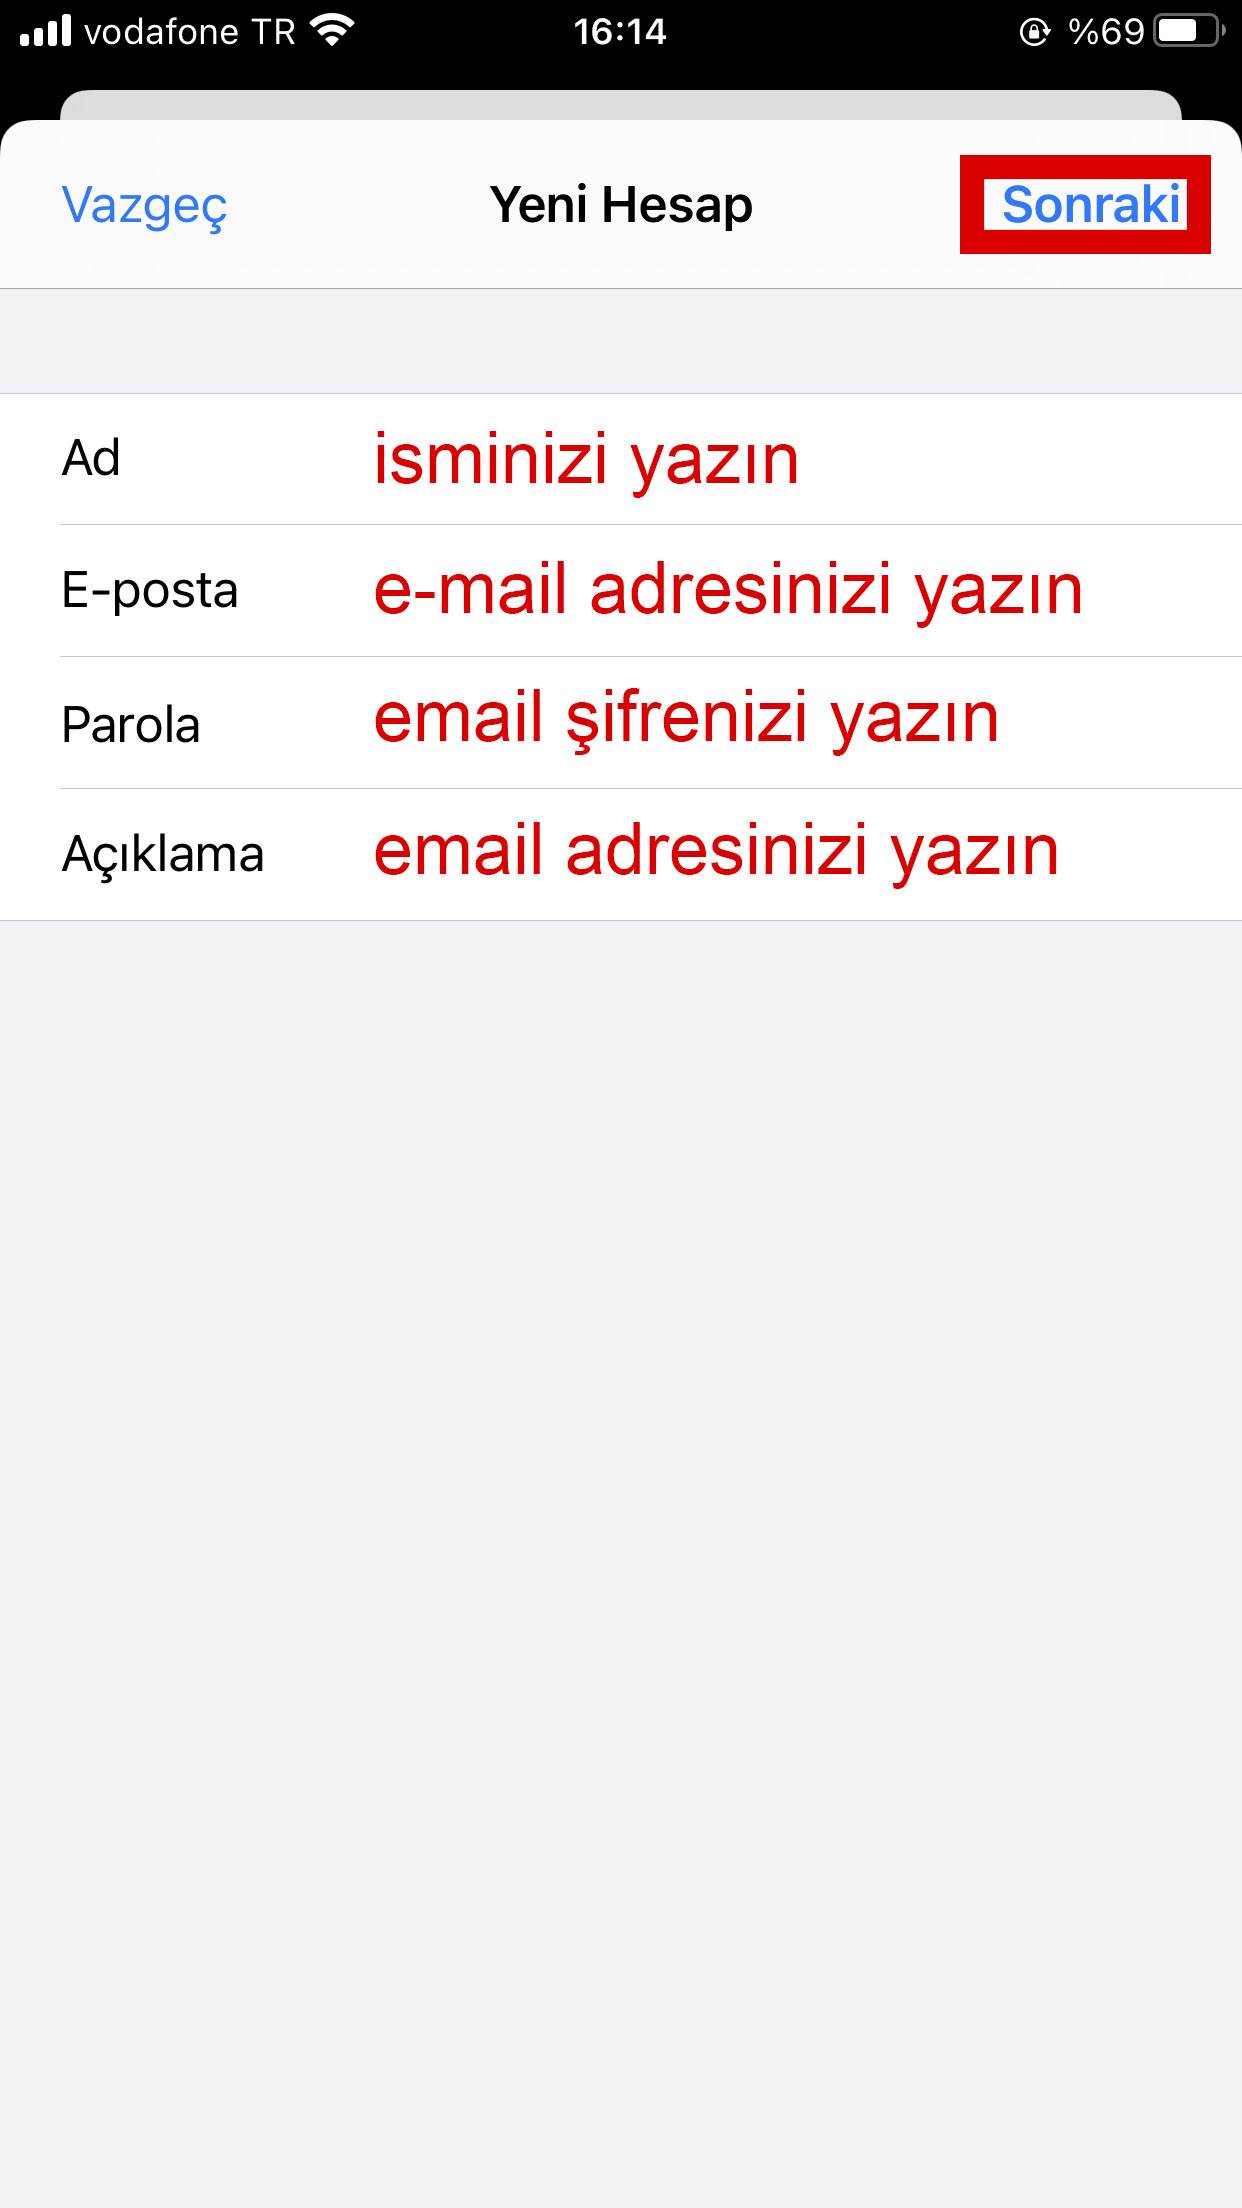
type your name, email address and password.
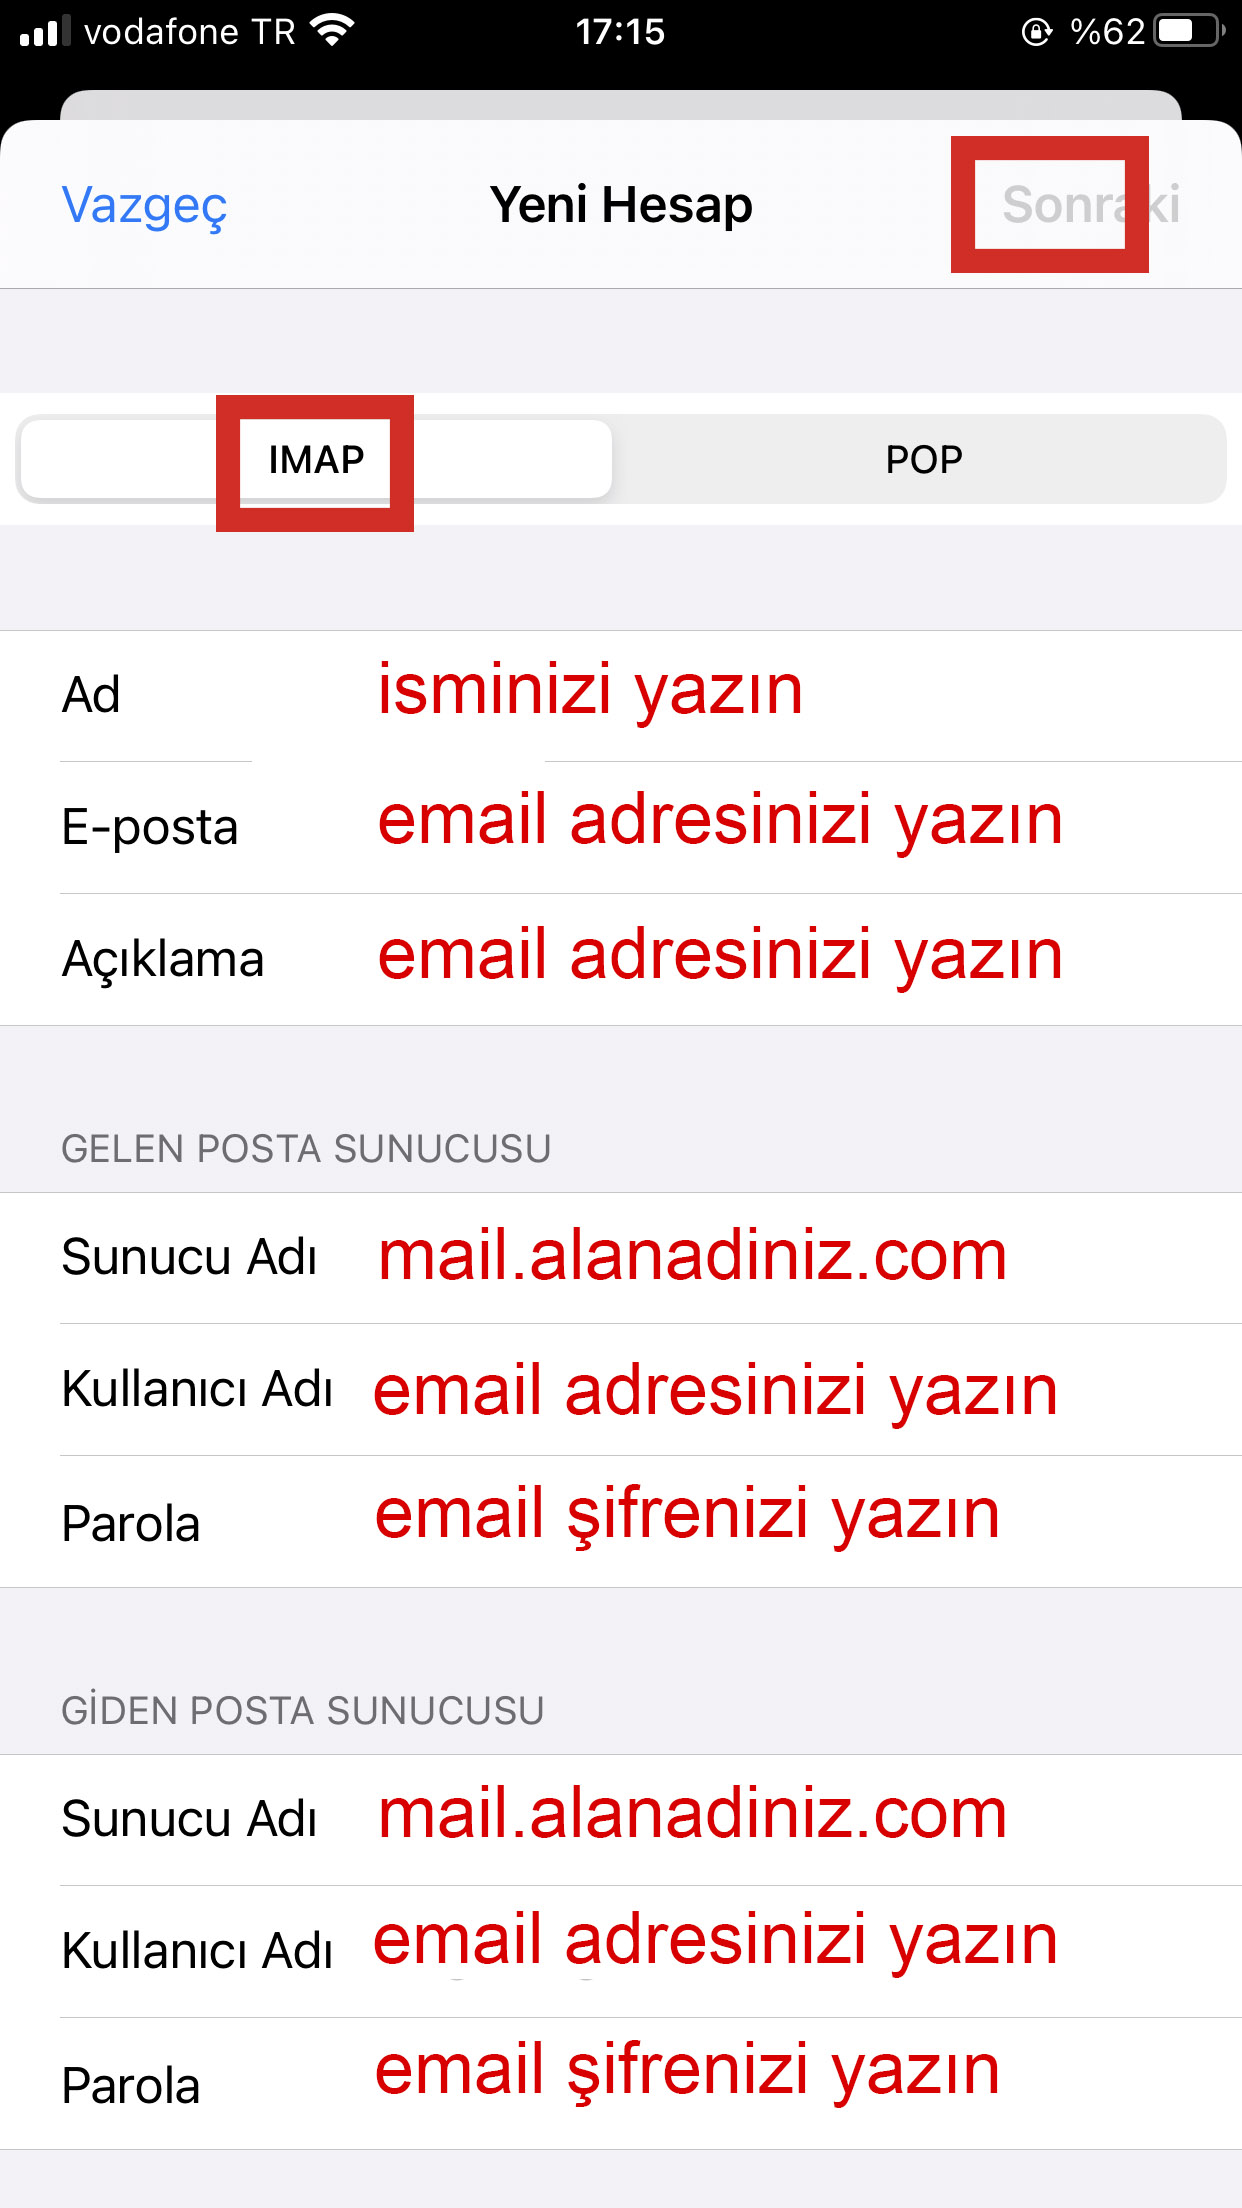
Fill in the Incoming and Outgoing mail servers with your own information.
The server name is mail.alanadiniz.com.
For example, if your domain email address is “[email protected]”, your server name is “mail.aso.com.tr”.
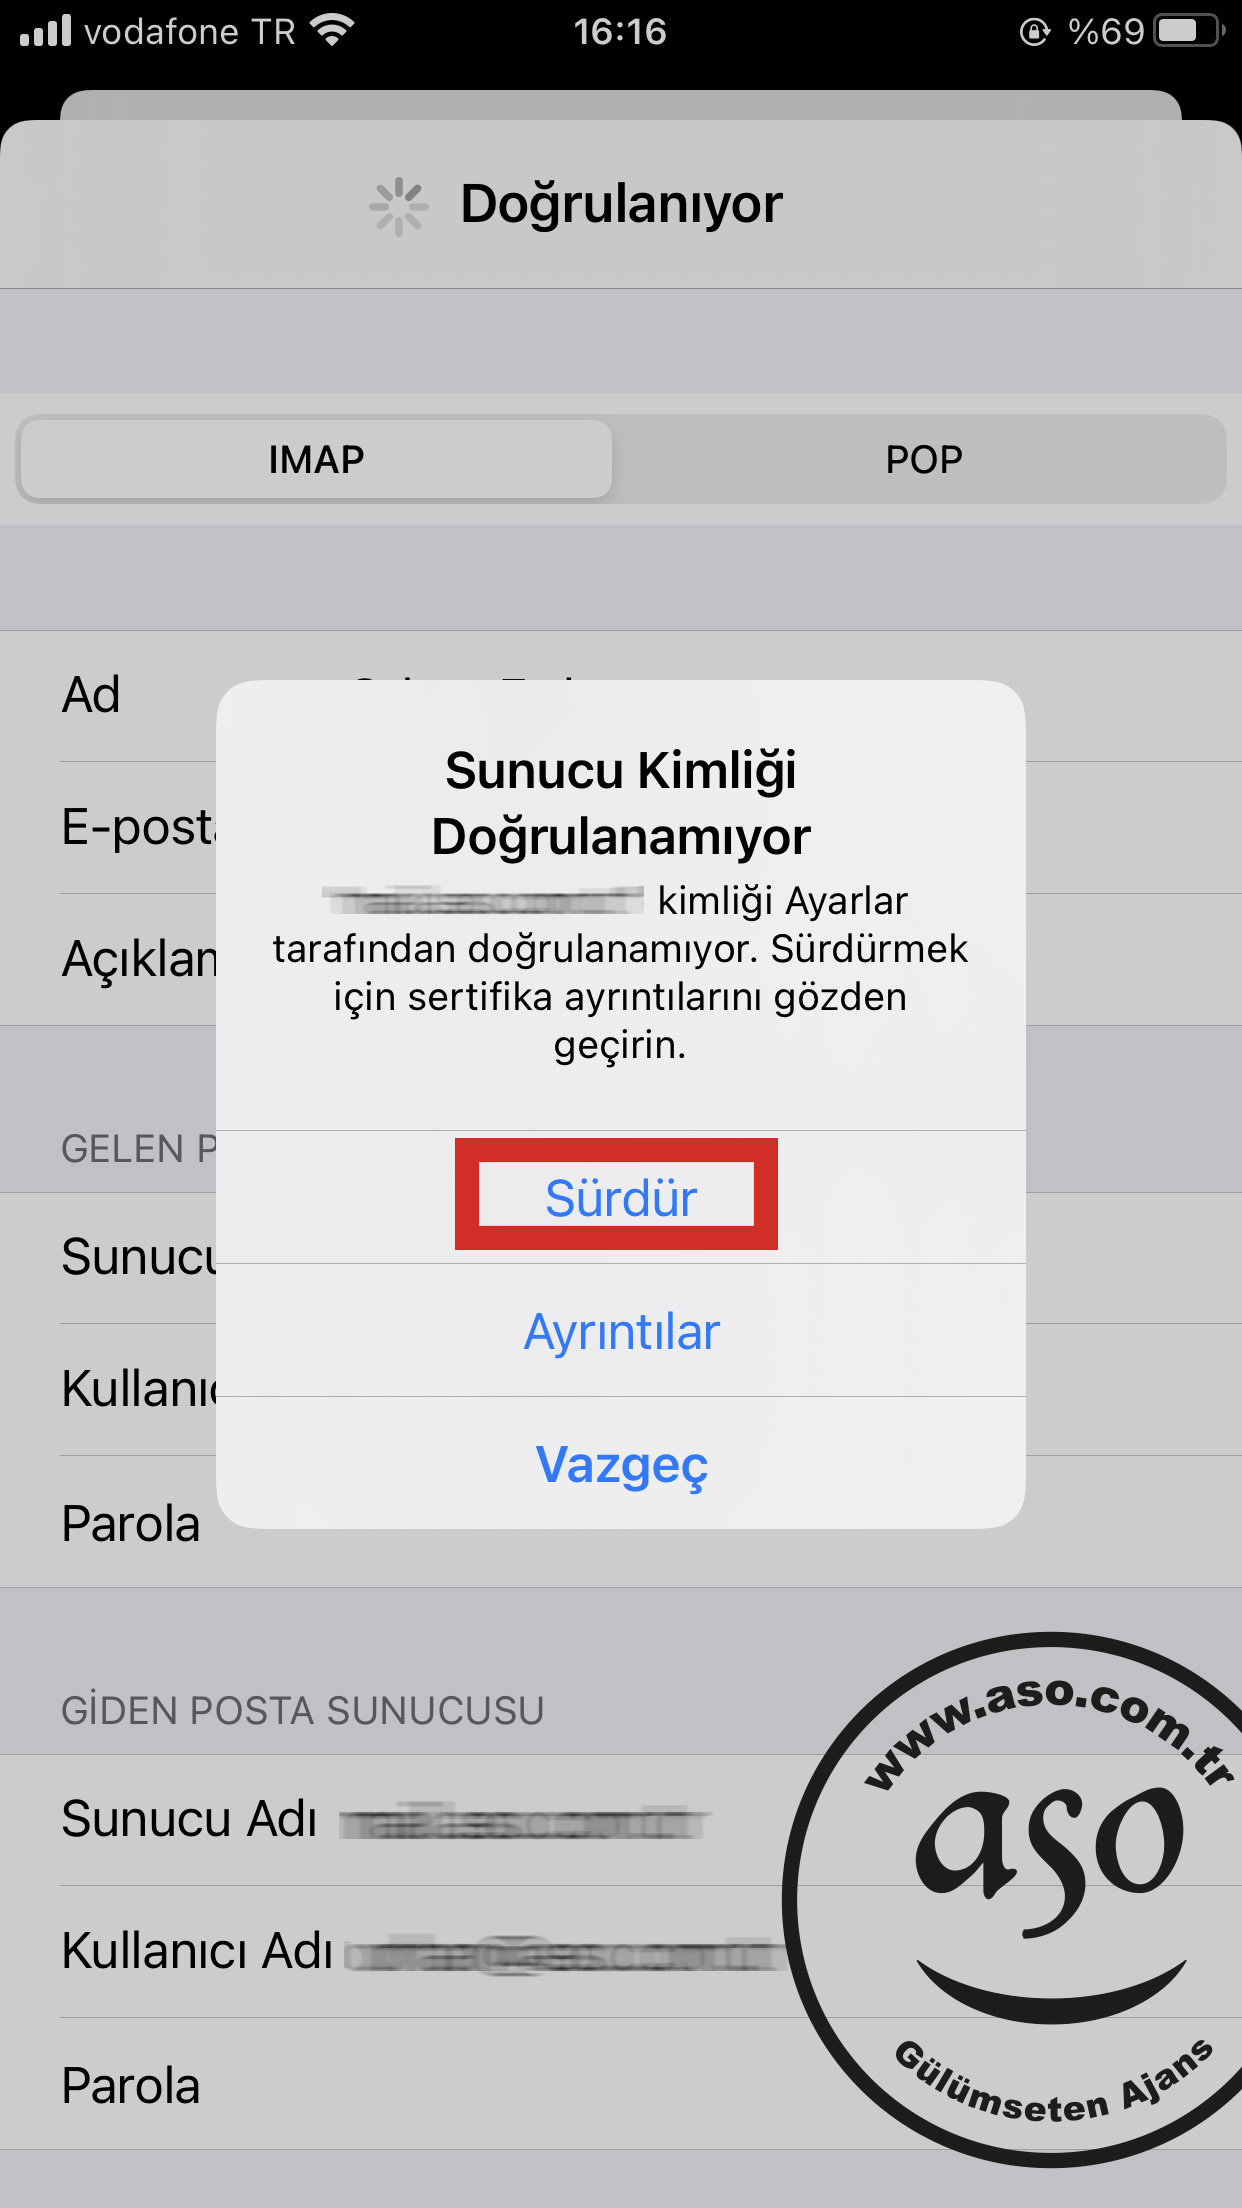
The server may ask for a certificate. Make it trust the certificate by tapping “Continue”
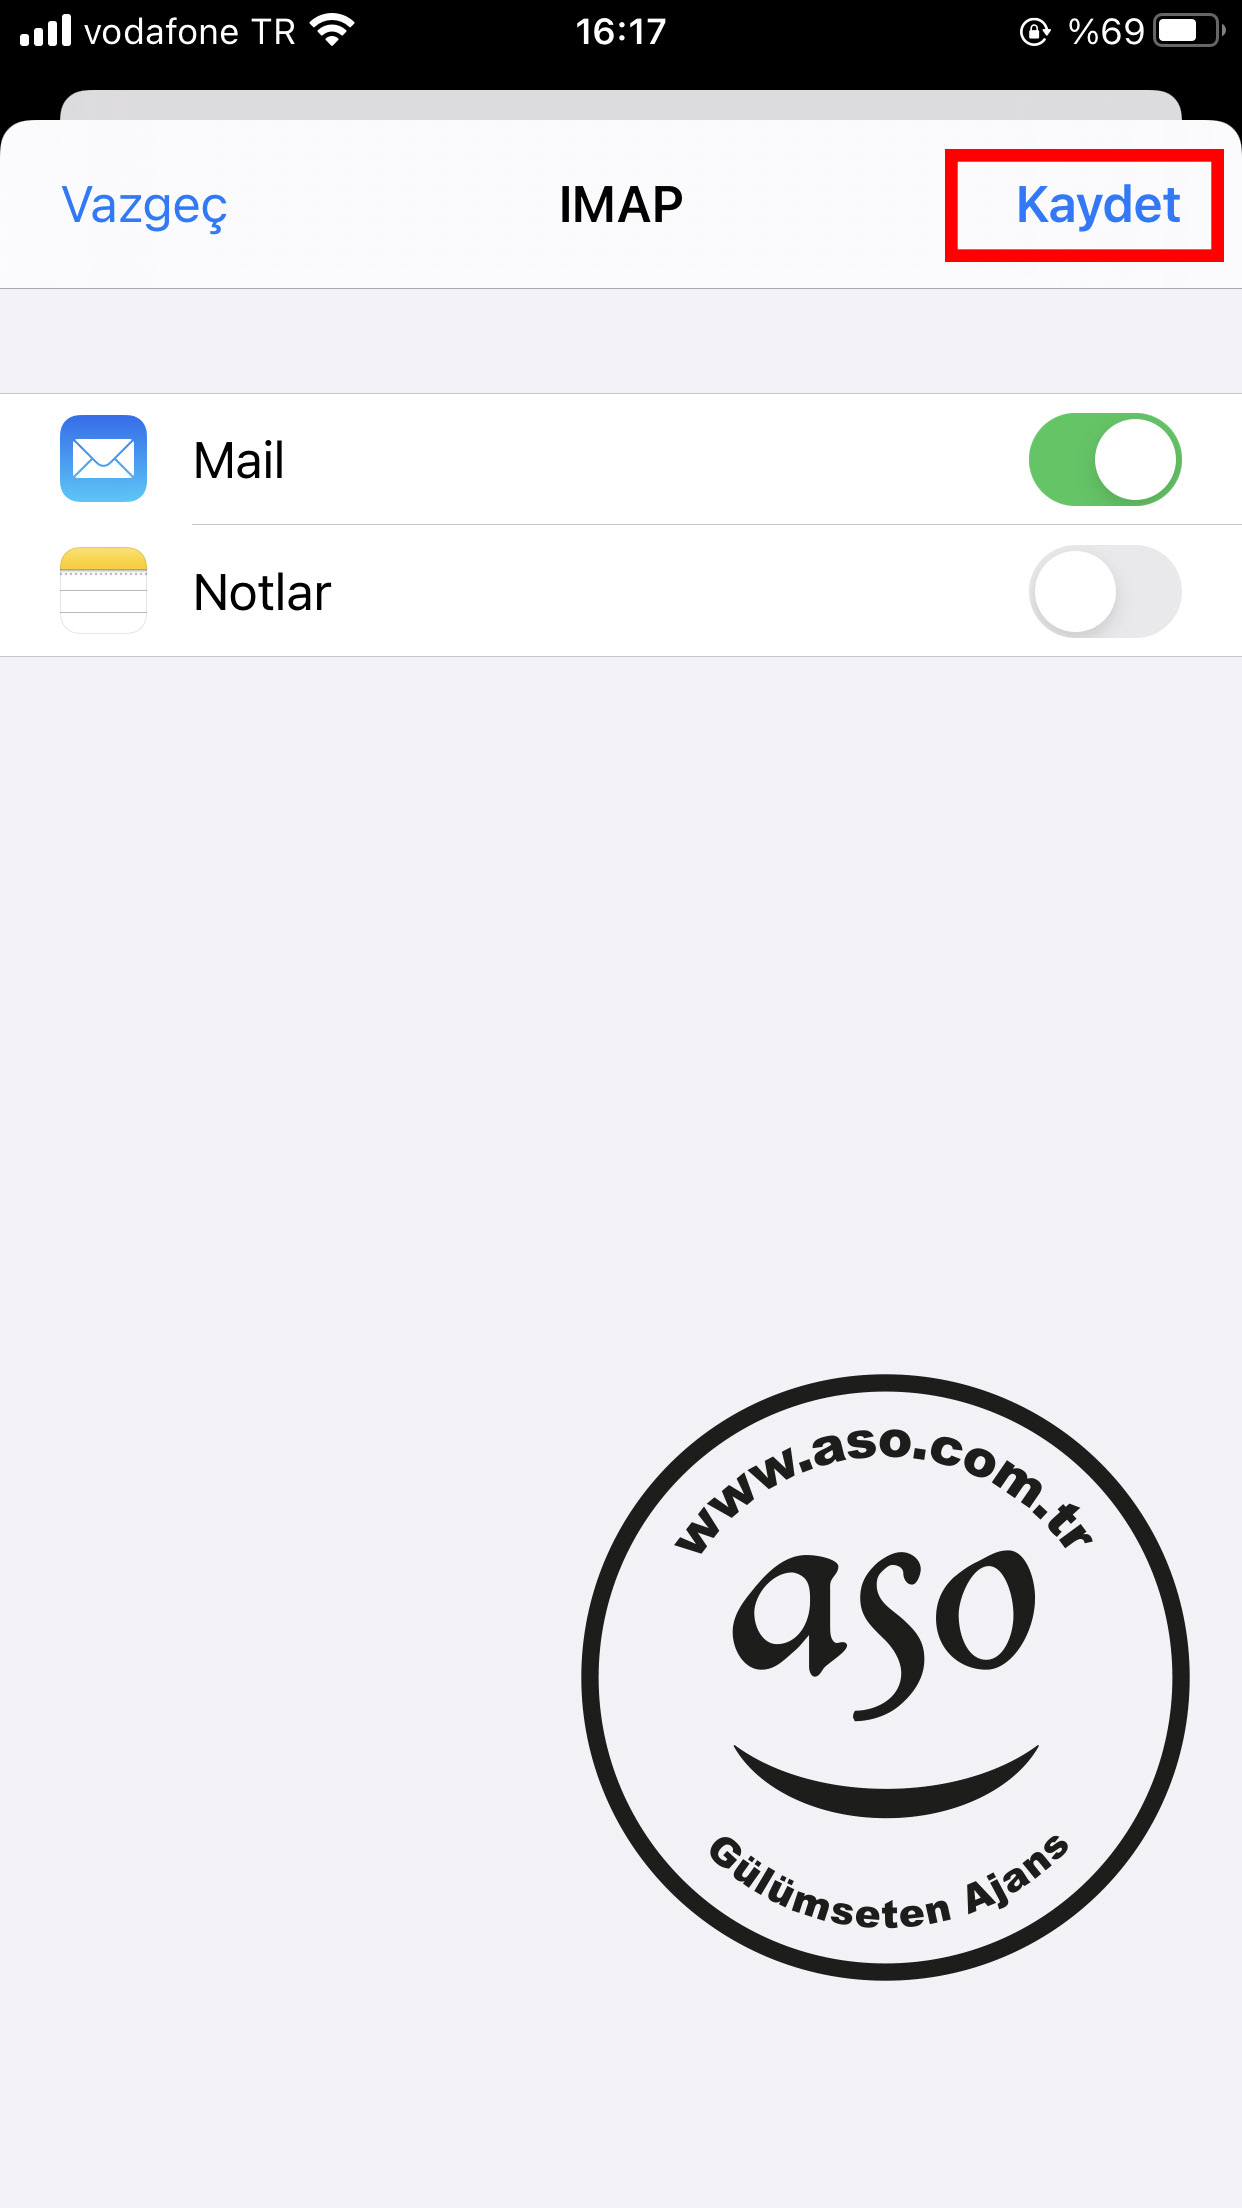
Register your account by tapping Save. You have completed the email setup.
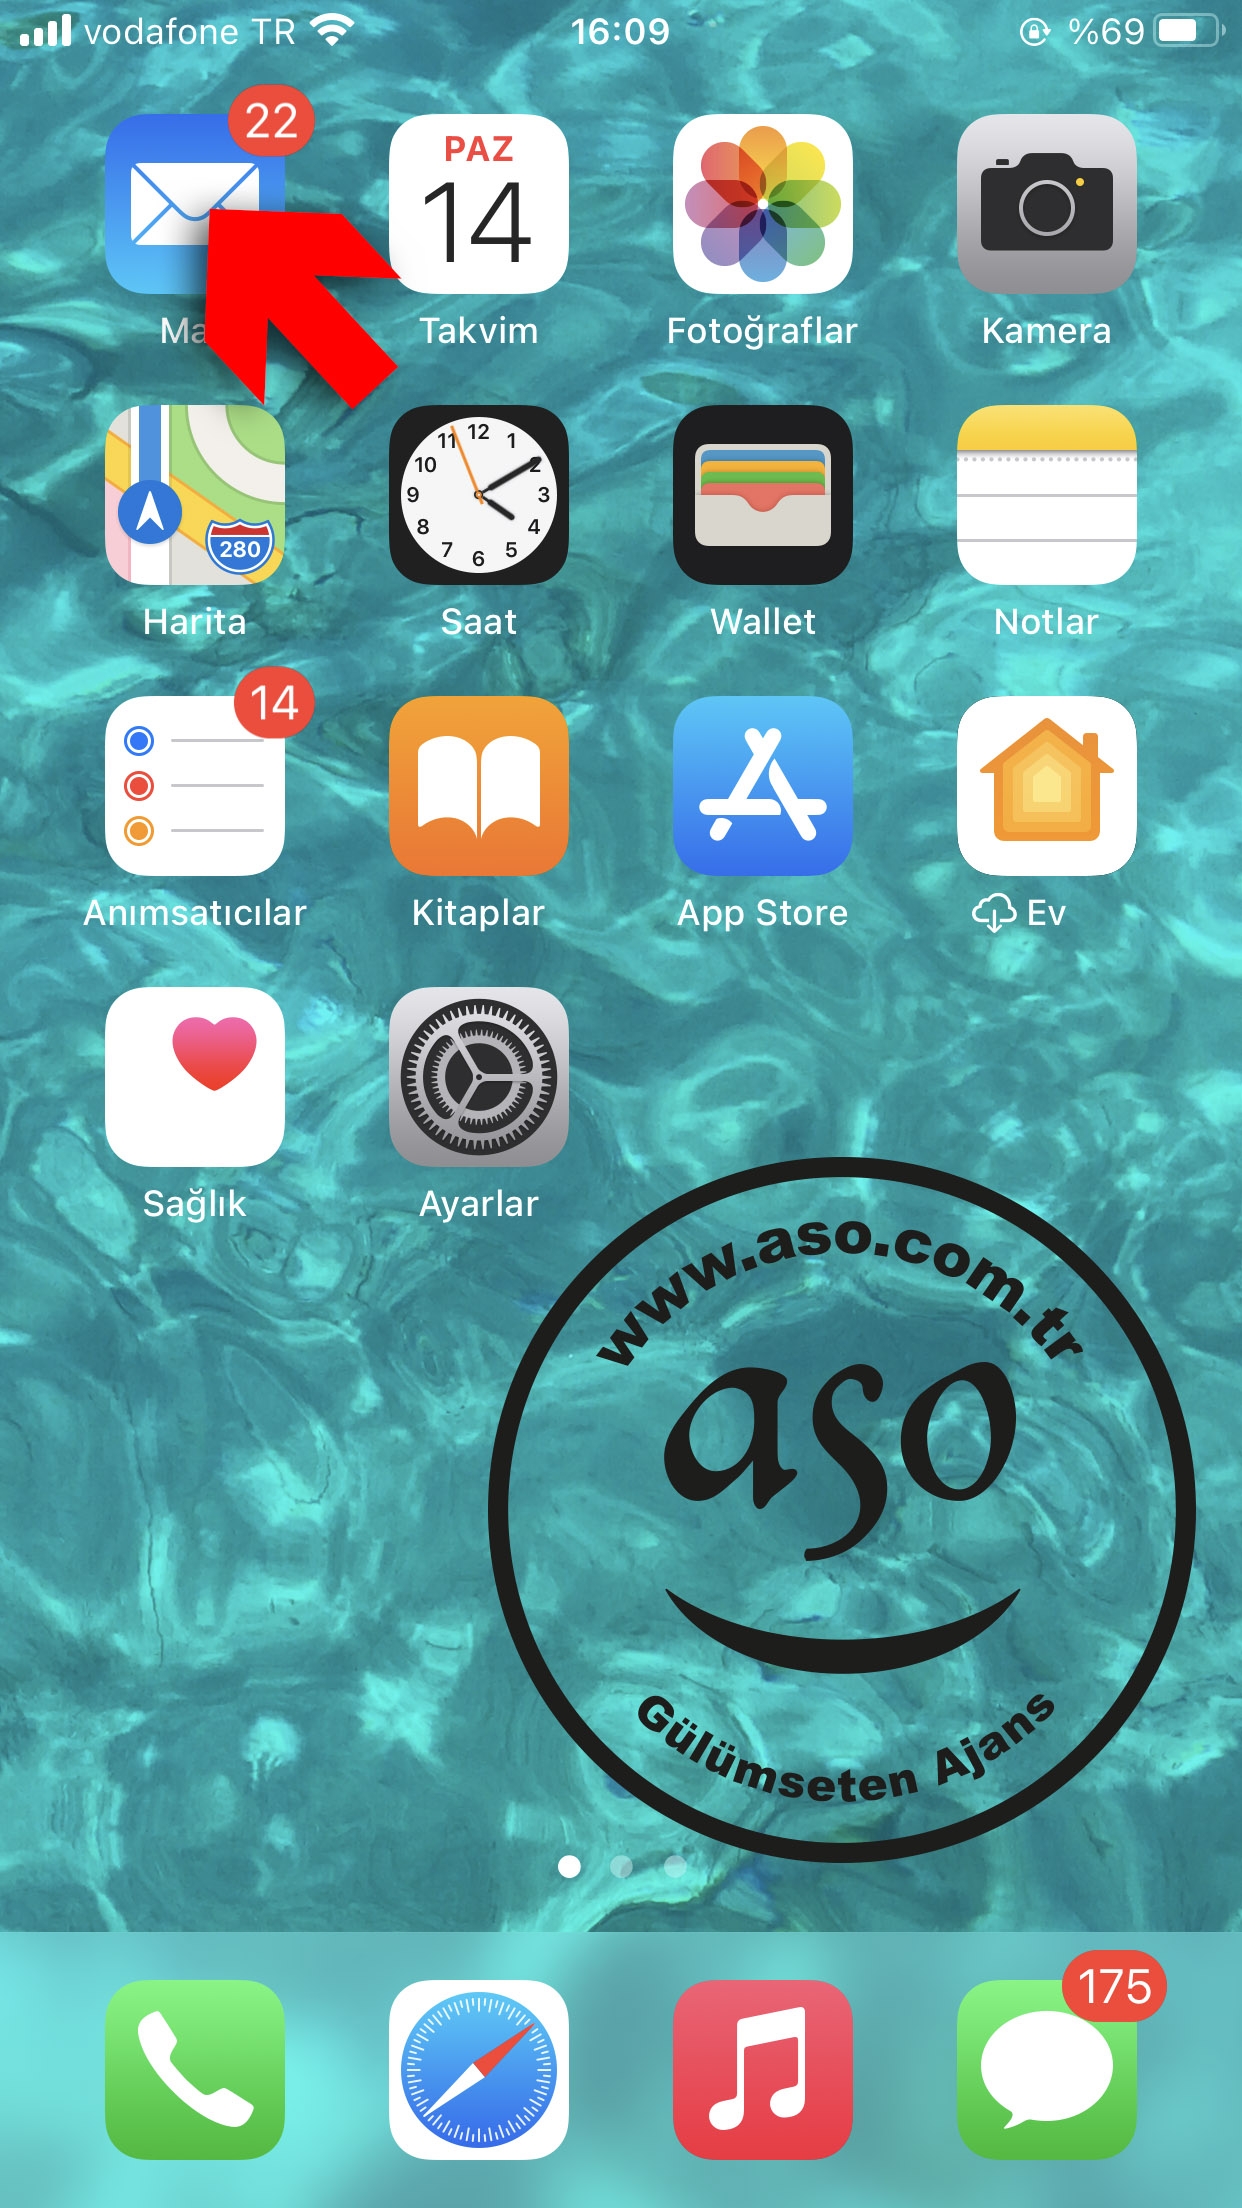
Go to the home screen and tap the Mail icon
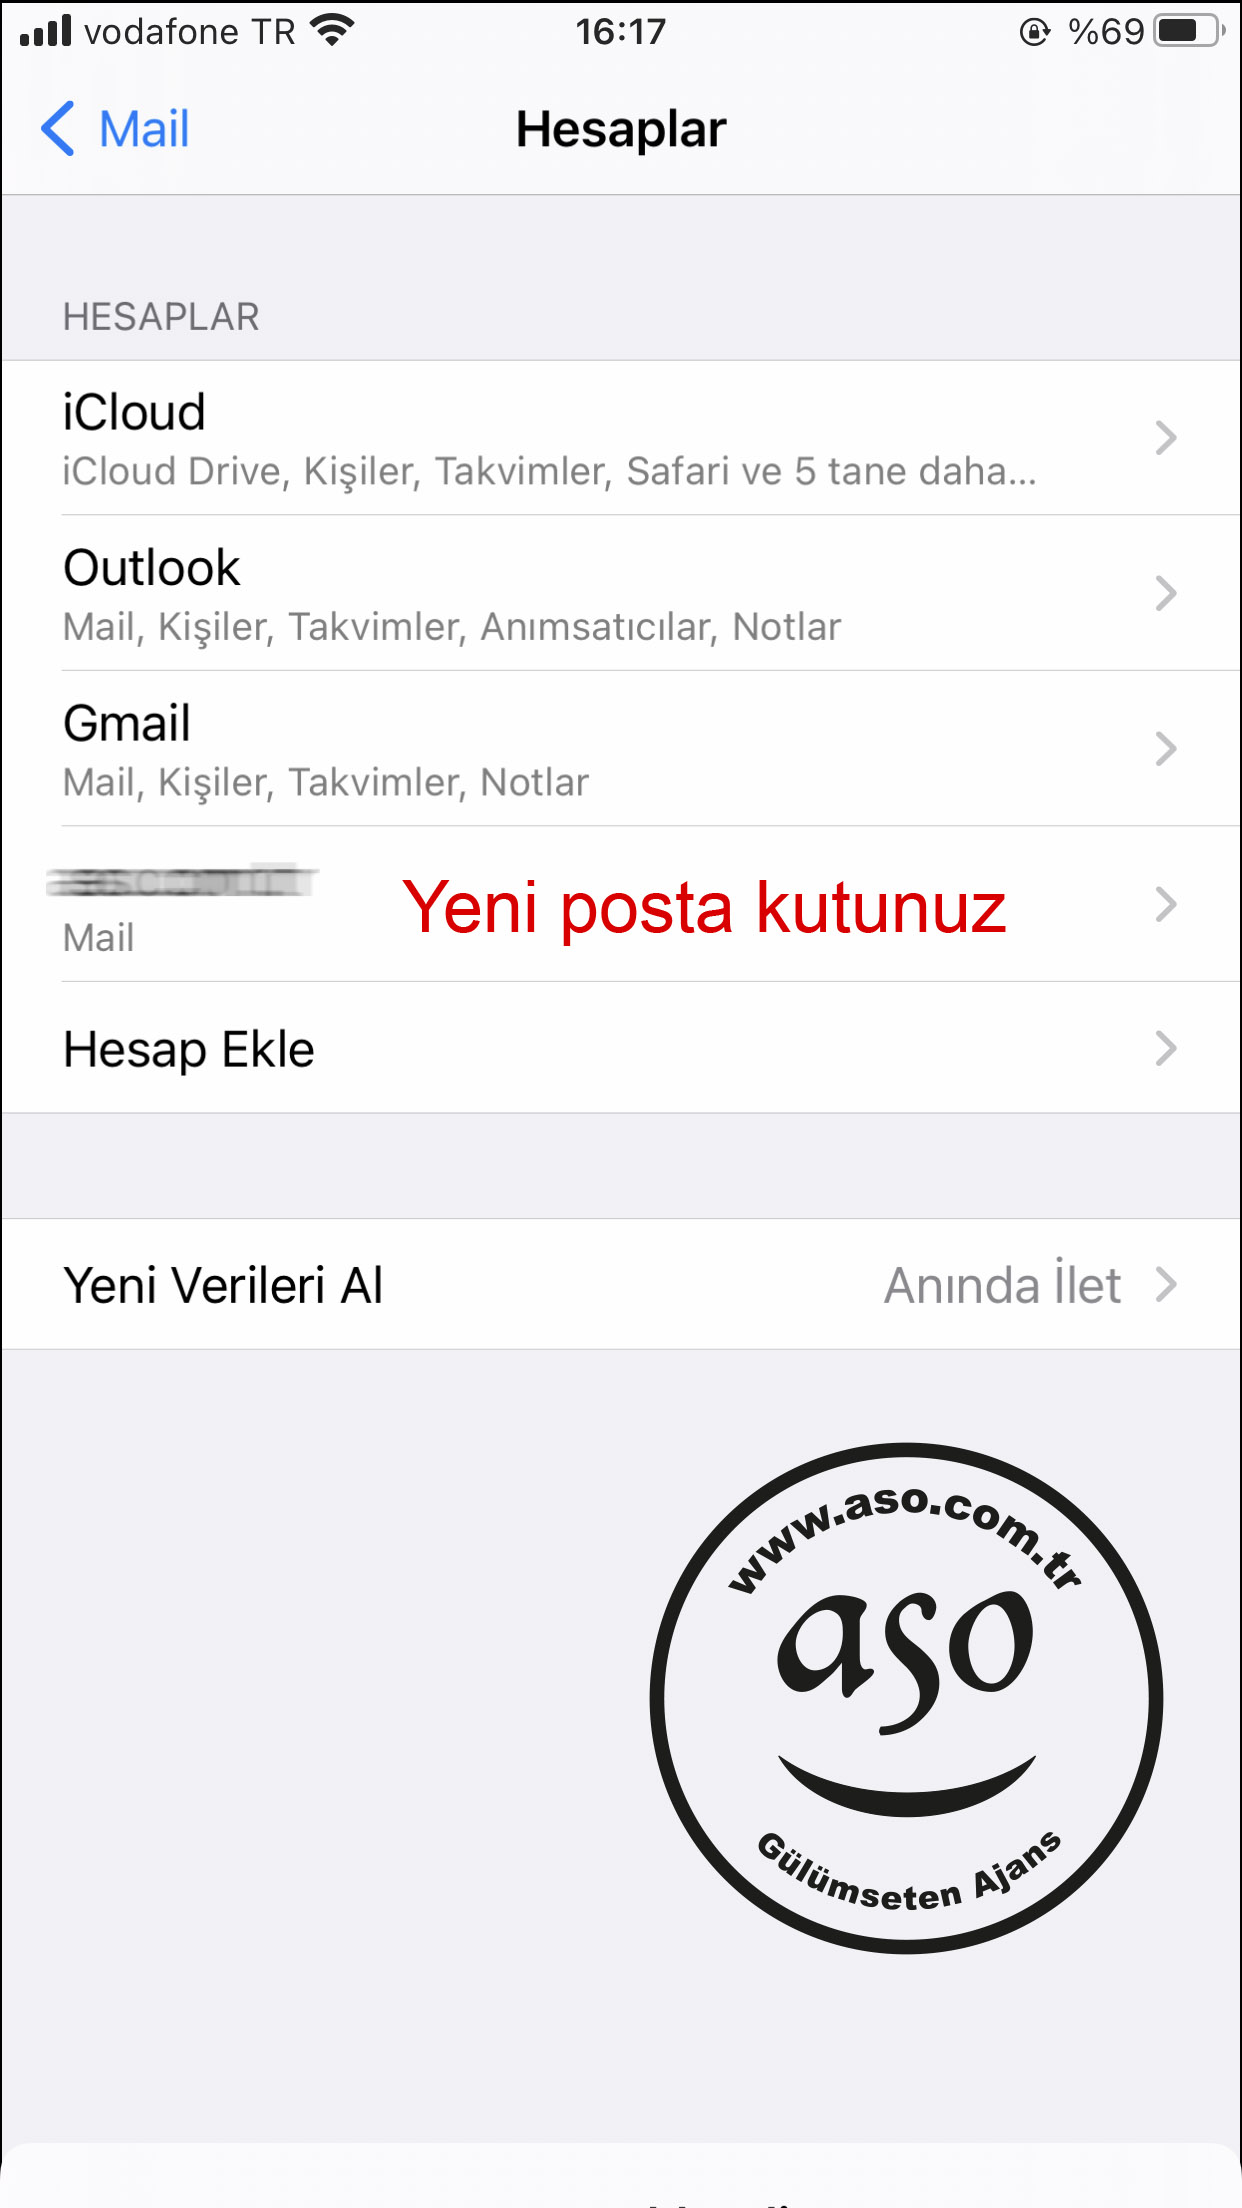
You can receive and send mail by tapping your new mailbox.
If you host a website on our servers and use e-mail, we provide free consultancy services for all settings, server redirection and other issues related to your Iphone.
Click here for mail settings for other devices and e-mail programs.
Tags: iphone, iphone, iphone mail, i-phone, iphone mail setting, iphone setting, iphone email setup, how should i do iphone setting, iphone email setup

This Post Has 0 Comments